To display Google Maps in your Progressive Web App (PWA), you need a Google Cloud project with billing enabled and a valid API key. Without billing, Google only serves one map request per day.
Each Google Maps service has its own free monthly cap: 10,000 map loads, 10,000 static map images and 10,000 address lookups on the global price list (70,000 on accounts eligible to the India price list). Beyond these caps, your billing account is charged. The former $200 monthly credit ended on March 1, 2025, and the $300 Google Cloud free trial is not a Maps free tier. See Google Maps Platform pricing .
Follow the steps below in this order.
Each Google Maps service has its own free monthly cap: 10,000 map loads, 10,000 static map images and 10,000 address lookups on the global price list (70,000 on accounts eligible to the India price list). Beyond these caps, your billing account is charged. The former $200 monthly credit ended on March 1, 2025, and the $300 Google Cloud free trial is not a Maps free tier. See Google Maps Platform pricing .
Follow the steps below in this order.
1. Create a billing account
To use Google Maps Platform, you must have a billing account. The billing account is used to track costs associated with your projects.
1. Go to the Google Cloud Platform Console .
2. Click the navigation menu button at the top left, and select "Billing".
3. Set up your billing account.
If this is your first billing account, on the Billing page:
-Click the Add billing account button.
-Follow the steps to set up your first billing account.
If you already have a billing account, on the Billing page:
-Click the billing drop-down and select Manage billing accounts. You'll see a list of your current billing accounts.
-Select Create account
-Follow the instructions to set up your next billing account.
Find more information on Google's documentation: https://developers.google.com/maps/gmp-get-started#create-billing-account
1. Go to the Google Cloud Platform Console .
2. Click the navigation menu button at the top left, and select "Billing".
3. Set up your billing account.
If this is your first billing account, on the Billing page:
-Click the Add billing account button.
-Follow the steps to set up your first billing account.
If you already have a billing account, on the Billing page:
-Click the billing drop-down and select Manage billing accounts. You'll see a list of your current billing accounts.
-Select Create account
-Follow the instructions to set up your next billing account.
Find more information on Google's documentation: https://developers.google.com/maps/gmp-get-started#create-billing-account
2. Create a project
To use Google Maps Platform, you must have a project . The project is the basis for managing services, credentials, billing, APIs, and SDKs. Usage costs associated with the project will be charged to the billing account linked to the project.
If you don't have a Google account, create one to continue the process.
To create a project:
1. Go to the Google Cloud Platform Console.
2. Click the menu button at the top left and select "Home".
3. Click the project drop-down and select "NEW PROJECT".
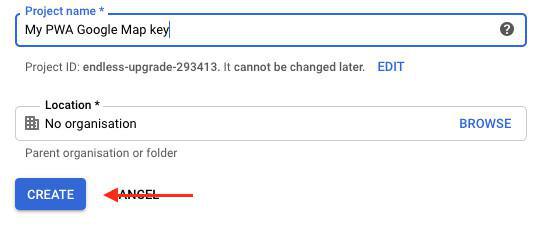
4. On the New Project page, fill in the required information.
- Project name: Accept the default or enter a customized name.
The project name can be changed at any time. For more information, see Identifying projects.
- Project ID: Accept the default or click EDIT to enter a customized ID.
The project ID cannot be changed after the project is created, so choose an ID that you'll be comfortable using for the lifetime of the project.
- Location: If you have an organization you want to link your project to, click Browse and select it, otherwise choose "No organization".
For more information, see Creating and Managing Folders and Relationships between organizations, projects, and billing accounts.
5. Click "CREATE"
If you don't have a Google account, create one to continue the process.
To create a project:
1. Go to the Google Cloud Platform Console.
2. Click the menu button at the top left and select "Home".
3. Click the project drop-down and select "NEW PROJECT".
4. On the New Project page, fill in the required information.
- Project name: Accept the default or enter a customized name.
The project name can be changed at any time. For more information, see Identifying projects.
- Project ID: Accept the default or click EDIT to enter a customized ID.
The project ID cannot be changed after the project is created, so choose an ID that you'll be comfortable using for the lifetime of the project.
- Location: If you have an organization you want to link your project to, click Browse and select it, otherwise choose "No organization".
For more information, see Creating and Managing Folders and Relationships between organizations, projects, and billing accounts.
5. Click "CREATE"
3. Enable the APIs
Your PWA uses three Google APIs. Enable them in the project you have just created:
1. Go to the Maps API Library page
2. Click "Maps JavaScript API", then "Enable" (interactive maps)
3. Go back, click "Maps Static API", then "Enable" (map images)
4. Go back, click "Geocoding API", then "Enable" (the "use my location" action of address fields)
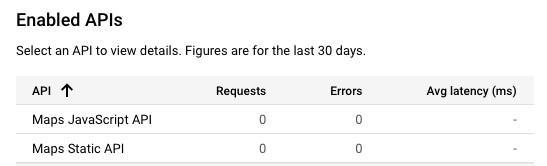
5. Check that the three APIs are enabled.
Your PWA does not use Places, Directions or Distance Matrix: you do not need to enable them.
1. Go to the Maps API Library page
2. Click "Maps JavaScript API", then "Enable" (interactive maps)
3. Go back, click "Maps Static API", then "Enable" (map images)
4. Go back, click "Geocoding API", then "Enable" (the "use my location" action of address fields)
5. Check that the three APIs are enabled.
Your PWA does not use Places, Directions or Distance Matrix: you do not need to enable them.
4. Get an API key
To use Google Maps Platform, you must have an API key . The API key is added to all of your requests and applications.
1. Go to the APIs & Services > Credentials page .
2. Click Create credentials > API key.
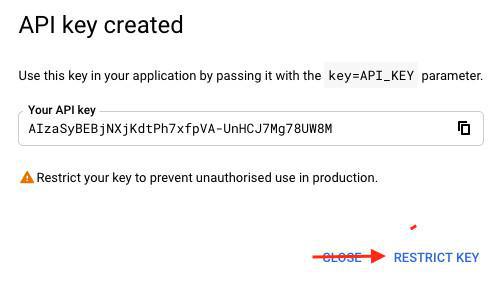
The API key created dialog displays your newly created API key.
3. Click "Restrict Key"
1. Go to the APIs & Services > Credentials page .
2. Click Create credentials > API key.
The API key created dialog displays your newly created API key.
3. Click "Restrict Key"
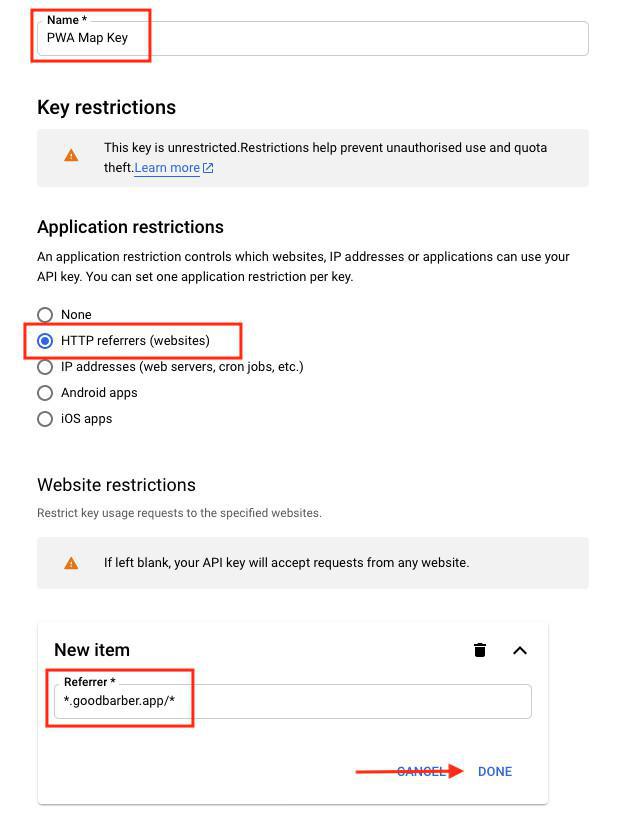
4. Edit the default name to "PWA Map Key"
5. Under Application restrictions, select Websites
6. Add your domain twice, so that every address of your PWA is allowed:
https://mydomain.com/* and https://*.mydomain.com/*
EXAMPLE if you still use GoodBarber's address: https://*.goodbarber.app/*
Warning: when you install a domain name on your PWA later, add it to the list. Keep the GoodBarber address in the list as well.
7. Under API restrictions, select Restrict key and check Maps JavaScript API, Maps Static API and Geocoding API. If one of them is missing, the matching feature of your PWA stops working.
8. Click "Save"
5. Under Application restrictions, select Websites
6. Add your domain twice, so that every address of your PWA is allowed:
https://mydomain.com/* and https://*.mydomain.com/*
EXAMPLE if you still use GoodBarber's address: https://*.goodbarber.app/*
Warning: when you install a domain name on your PWA later, add it to the list. Keep the GoodBarber address in the list as well.
7. Under API restrictions, select Restrict key and check Maps JavaScript API, Maps Static API and Geocoding API. If one of them is missing, the matching feature of your PWA stops working.
8. Click "Save"
5. Add the API Key to your PWA
1. Copy your API key

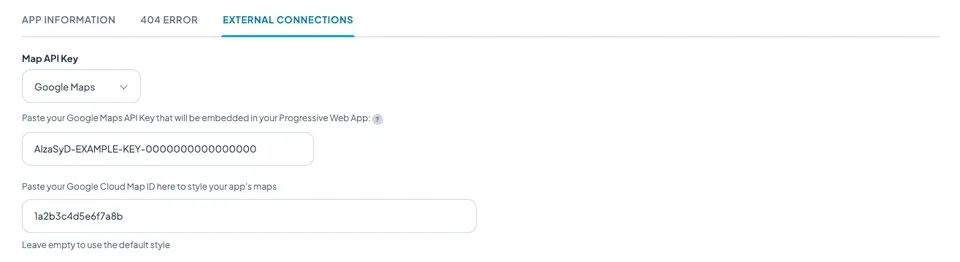
2. In your back office, go to the menu Settings > Other settings > External connections
3. Under Map API Key, select Google Maps
4. Paste your API key
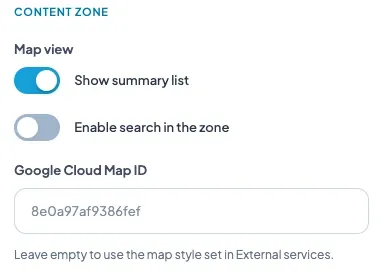
5. Optional: paste a Google Cloud map ID to style your maps (see below)
6. Click "Save"
3. Under Map API Key, select Google Maps
4. Paste your API key
5. Optional: paste a Google Cloud map ID to style your maps (see below)
6. Click "Save"
6. Update your Progressive Web App
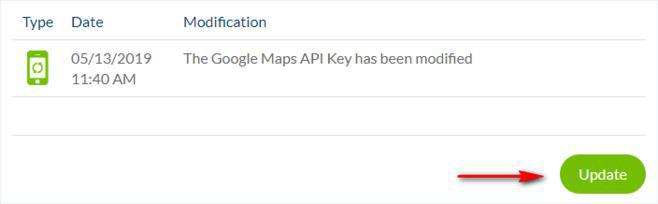
1. Go to the menu Sales channels > PWA > Update
2. Click "Update"
That's it, the Google Maps API Key is now set in your PWA.
Close your PWA and restart it for the changes to take effect.
2. Click "Update"
That's it, the Google Maps API Key is now set in your PWA.
Close your PWA and restart it for the changes to take effect.
7. Style your maps with a map ID (optional)
A map ID applies a style saved in your Google Cloud project to the maps of your PWA. Without map ID, your PWA keeps the standard Google map.
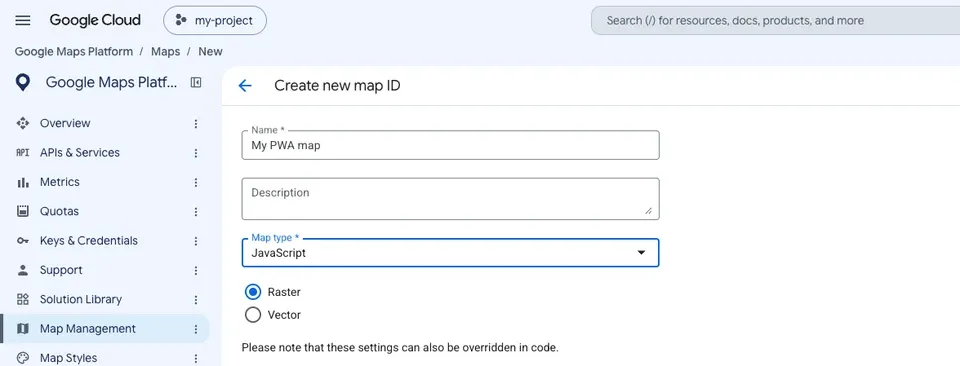
1. In the same Google Cloud project as your API key, go to the Map Management page
2. Click "Create map ID"
3. Give it a name, select the JavaScript map type, then Raster (flat map) or Vector
4. Click "Save" and copy the map ID
1. In the same Google Cloud project as your API key, go to the Map Management page
2. Click "Create map ID"
3. Give it a name, select the JavaScript map type, then Raster (flat map) or Vector
4. Click "Save" and copy the map ID
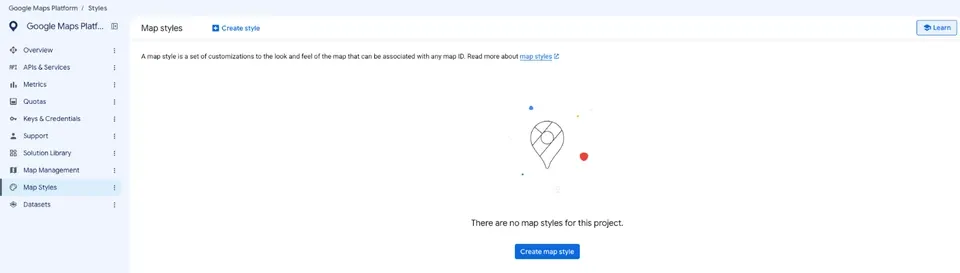
5. On the Map Styles page, create a style, customize it and publish it. Then go back to Map Management, open your map ID and, under Map styles, select your style for Light mode. Your PWA always displays the Light mode style, even on a device set to dark mode: the Dark mode style is not used. See Google's documentation for details.
6. Paste the map ID in Settings > Other settings > External connections to style every map of your app.
7. To give a Maps section, an Agenda section or a Map widget its own style, paste a map ID in the map settings of its design. Leave that field empty to keep the map ID of the app.
Warning: paste the map ID shown on the Map Management page, not the style ID shown on the Map Styles page. With a style ID, the map keeps the default Google style.
8. Update the settings of your PWA.
On the maps that use a map ID, markers are displayed with Google's advanced markers. The map ID must come from the same Google Cloud project as your API key. Using a map ID on a web map does not cost more: each map is still one map load.
7. To give a Maps section, an Agenda section or a Map widget its own style, paste a map ID in the map settings of its design. Leave that field empty to keep the map ID of the app.
Warning: paste the map ID shown on the Map Management page, not the style ID shown on the Map Styles page. With a style ID, the map keeps the default Google style.
8. Update the settings of your PWA.
On the maps that use a map ID, markers are displayed with Google's advanced markers. The map ID must come from the same Google Cloud project as your API key. Using a map ID on a web map does not cost more: each map is still one map load.
8. How to avoid a large bill if your usage unexpectedly increases?
Set quotas on your APIs: when a quota is reached, Google stops serving requests until the next day, so your bill cannot go beyond it. A budget alert only sends an email, it does not stop the usage.
https://developers.google.com/maps/faq#usage_cap
https://developers.google.com/maps/faq#usage_cap
9. Troubleshoot your PWA map API key
If your maps are still not displayed on your PWA once you have followed the full process:
1. Go to your Google Cloud Console
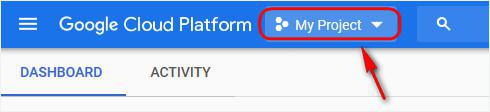
2. Select the project you created at step 1 of this online help from the top bar of Google console:
1. Go to your Google Cloud Console
2. Select the project you created at step 1 of this online help from the top bar of Google console:
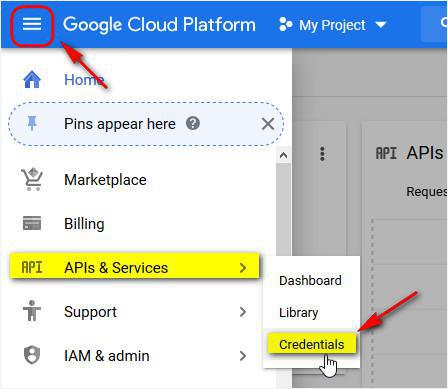
3. Click the Navigation menu > APIs & Services > Credentials:
4. Click the PWA map key you've created at step 3 of this online help
5. Make a screenshot of the settings of your key, so we can see the Application restriction and Website restrictions of your API key (see example below):
5. Make a screenshot of the settings of your key, so we can see the Application restriction and Website restrictions of your API key (see example below):
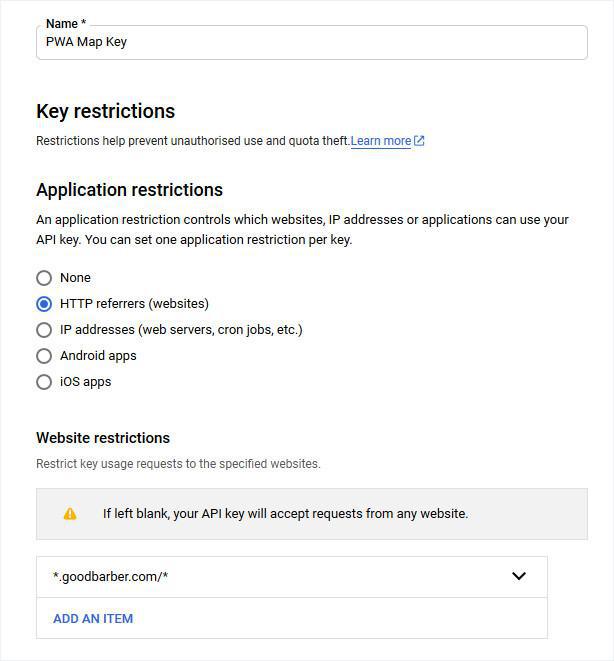
6. Create a screenshot of the full API key (see example below):

7. Open a ticket to the support explaining the issue with the screenshots attached.
Good to know: if maps display but the "use my location" action of address fields does not work, check that the Geocoding API is enabled and allowed on your key.
Good to know: if maps display but the "use my location" action of address fields does not work, check that the Geocoding API is enabled and allowed on your key.
