1. Install the User Groups extension
The User Groups extension allows you to manage your users by personalizing their access rights for each section of your app.
This extension is free.
Requirements for the activation:
1- Open the left swipe menu of your back office
2- Click on Extensions Store
3- Click on All Extensions in the Extensions Store menu
4- Scroll to "User groups" or search for it in the search bar
5- Click on "Install" to add the extension
This extension is free.
Requirements for the activation:
- Authentication extension installed (see this Online Help ).
1- Open the left swipe menu of your back office
2- Click on Extensions Store
3- Click on All Extensions in the Extensions Store menu
4- Scroll to "User groups" or search for it in the search bar
5- Click on "Install" to add the extension
2. Create a group
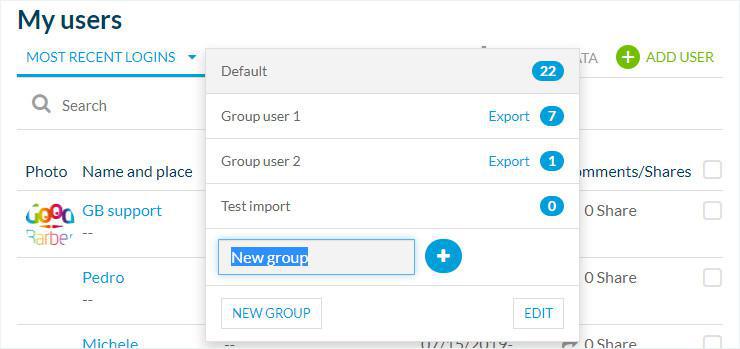
You will be redirected to the menu Community > User List .
A new field "Groups" is now available at the top of the section:
A new field "Groups" is now available at the top of the section:
- Click on the new field
- Click on "New Group".
- Write the name for your group
- Press the blue cross for the group to be created.
Modify the name of a group:
Click on Edit and the pencil icon after the name of the group if you want to modify it.
Display the list of groups:
Select the "Groups" field to display the list of groups you have created.Display the list of groups:
3. Add a user to a group
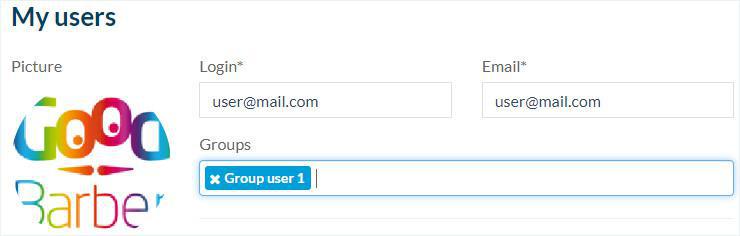
1. Click on the user’s profile.
You will have a field for groups where you can give assign your users to the created groups.
2. Click on the Groups field
3. Choose the group in the dropdown menu
4. Click on “Save”
You will have a field for groups where you can give assign your users to the created groups.
2. Click on the Groups field
3. Choose the group in the dropdown menu
4. Click on “Save”
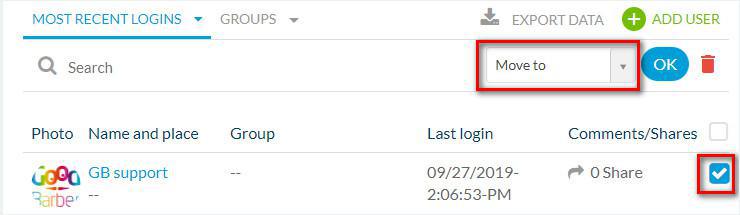
It is also possible to assign one or more users to a group at the same time directly from the menu Community > Users List .
- Select the user(s) of your choice
- Click "Move to" in the dropdown menu
- Select the group(s)
- Click OK.
4. Define each group's access rights
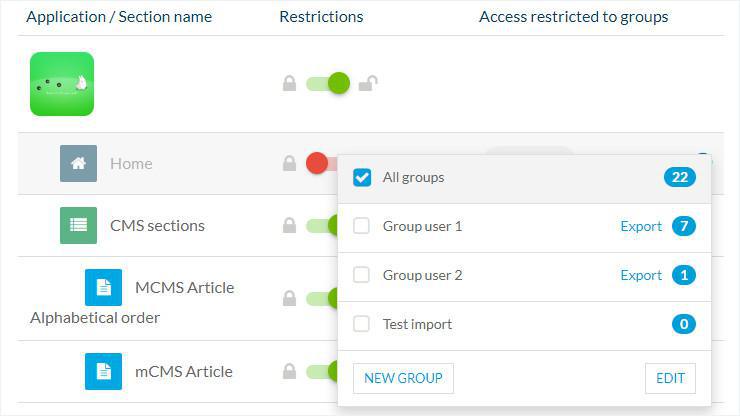
From the menu Community > Public/Private you can now personalize access rights to the content of your app.
By default, access to private sections is set to "All groups".
Note: It can take up to 24 hours for users already logged in to your app to have those settings applied to their account.
By default, access to private sections is set to "All groups".
- Click the "+" sign
- Select the groups that you want to have access to private content (whether this is the entire app or one or more sections of the app).
Note: It can take up to 24 hours for users already logged in to your app to have those settings applied to their account.
5. Set the text displayed to users when they are not authorized access it
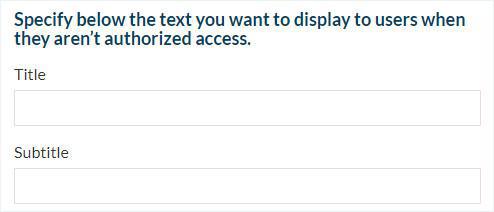
If users are part of a group that isn't granted permission to a particular section when trying to access this section content from your app, a text will be displayed to inform them they aren't authorized.
1- Open the menu Settings > Registration settings > Registration process .
2- Fill in the fields
3- Type Enter to validate the text in the field
1- Open the menu Settings > Registration settings > Registration process .
2- Fill in the fields
3- Type Enter to validate the text in the field
6. Restrictions option
"Restrictions" option allows to:
- Automatically add a new user group you create to existing restrictions.
or
- To disable the button and add a new user group manually to specific restricted sections.
1. Go to the menu Settings > Registration settings > Registration process left-hand menu.
2. Click on the Restrictions button
- Automatically add a new user group you create to existing restrictions.
or
- To disable the button and add a new user group manually to specific restricted sections.
1. Go to the menu Settings > Registration settings > Registration process left-hand menu.
2. Click on the Restrictions button

7. Video tutorial
Note: Menus have changed in the back office, but the behavior explained in the video is still accurate.