Connect Expedy Print to GoodBarber eCommerce via Zapier
Written by Paul-François Simoni on
In this article, we will show you how to automate the printing of orders from your GoodBarber eCommerce store by connecting Expedy Print via Zapier. This integration will help you streamline your order management while saving time.
Why connect Expedy Print to GoodBarber eCommerce?
Step 1: Create a Zapier Account
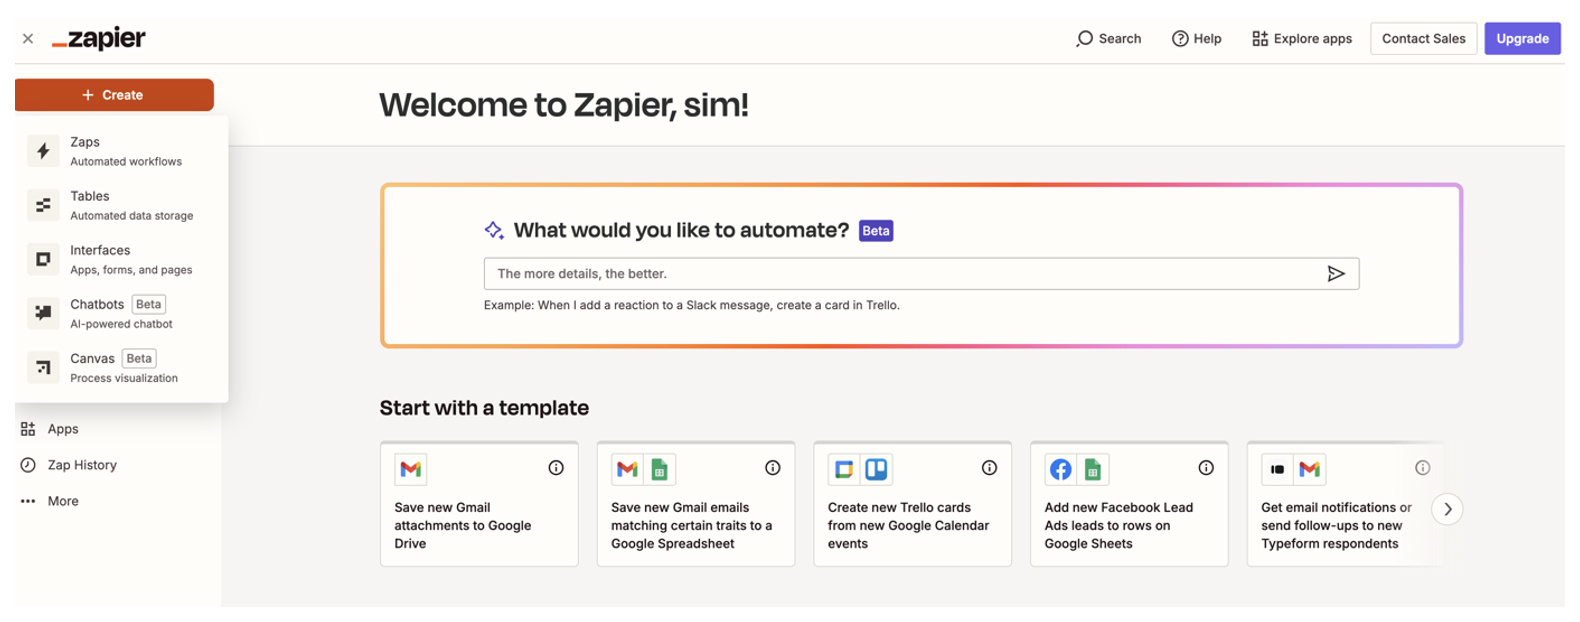
If you don't have a Zapier account yet, sign up. Zapier is a platform that connects your apps to automate repetitive tasks.
1. Log in to Zapier and click on "Create" then select "Zaps".
1. Log in to Zapier and click on "Create" then select "Zaps".
Step 2: Create an Expedy Print Account
Before you can connect Expedy Print to GoodBarber, you need to create an Expedy Print account. Go to Expedy Print and follow the sign-up instructions. Make sure your account is properly set up to manage your printing and shipping options.
Step 3: Set Up the Trigger with GoodBarber eCommerce
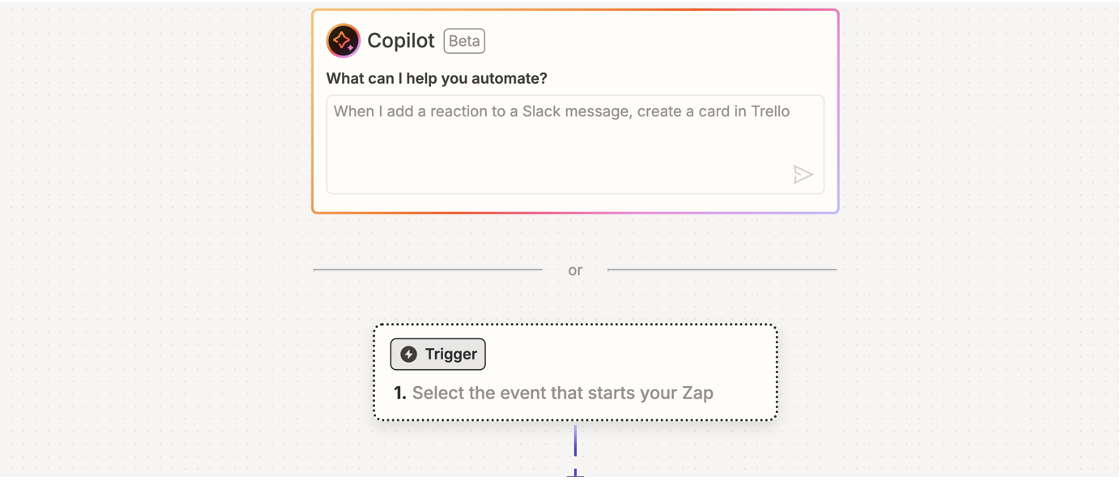
1. In the "Trigger App" field, select GoodBarber eCommerce.
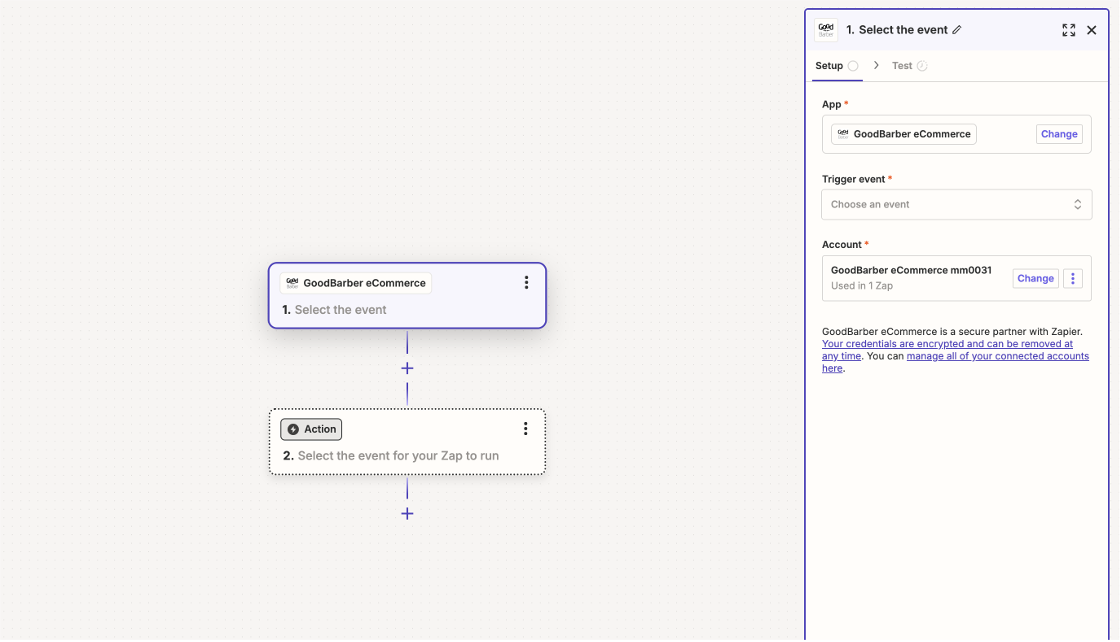
2. Select "New Order" as the trigger in the "Trigger Event" field. This means that every new order in your store will trigger an action in Zapier.
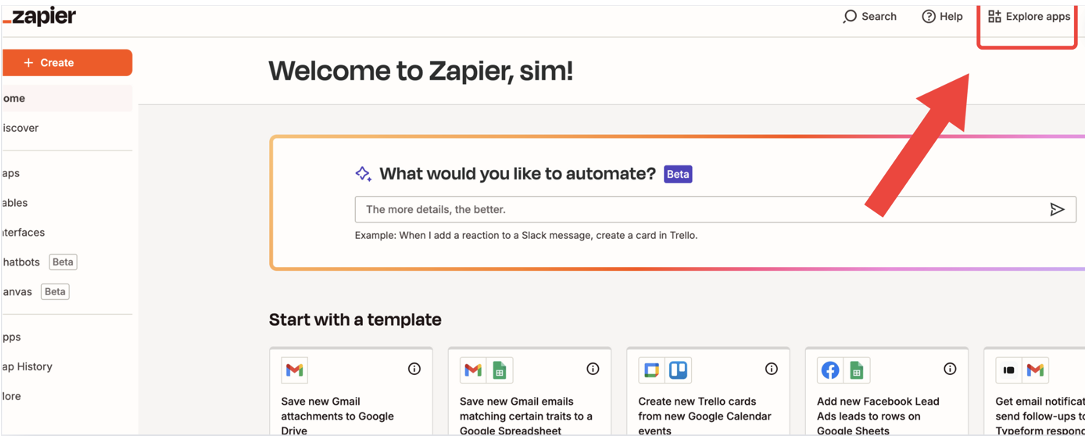
3. Follow the instructions to connect your GoodBarber eCommerce account to Zapier: From the Zapier platform, open the "Explore apps" menu.
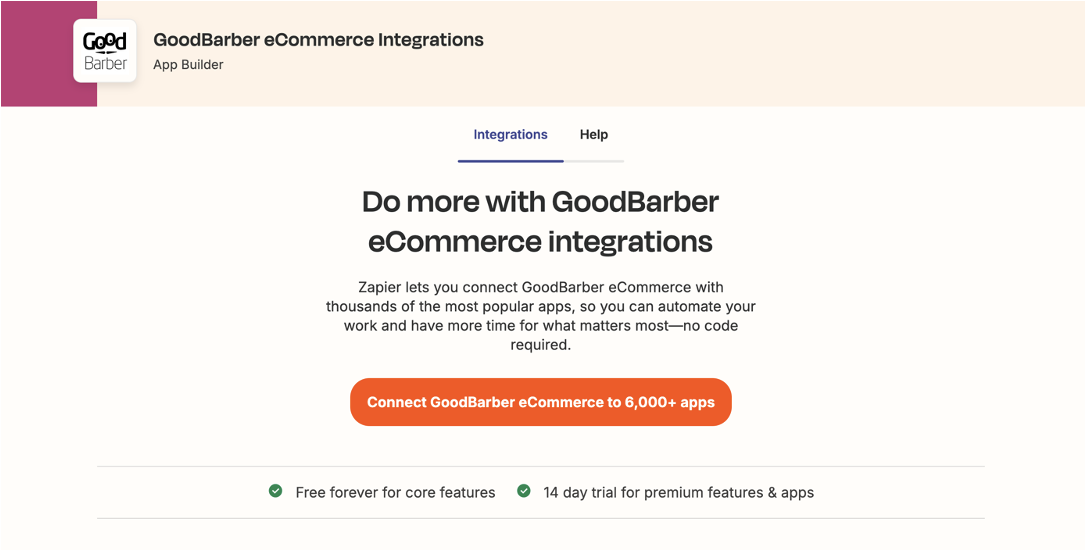
- Search for "GoodBarber eCommerce" and then click on "Add a connection".
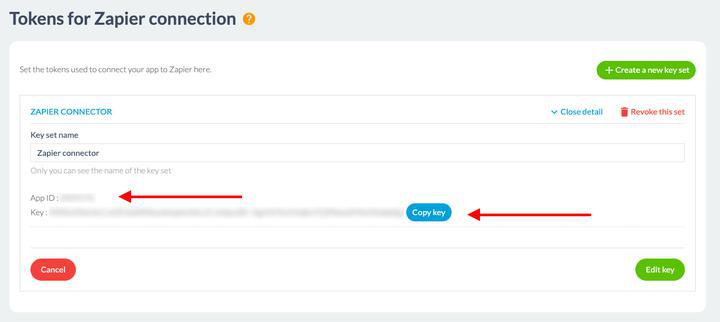
4. Create your API key by accessing your GoodBarber back office:
- Go to the Settings > Zapier menu.
- If you haven't generated an API yet, you'll need to create a unique key to connect GoodBarber to Zapier. Click on "Generate a key". To generate the API key necessary for the connection with Zapier, you first need to go to the Extensions Store in your GoodBarber back office. Search for and install the Zapier extension. Once the extension is installed, an option will be provided to generate an API key. This key is essential to securely connect your GoodBarber app to Zapier.
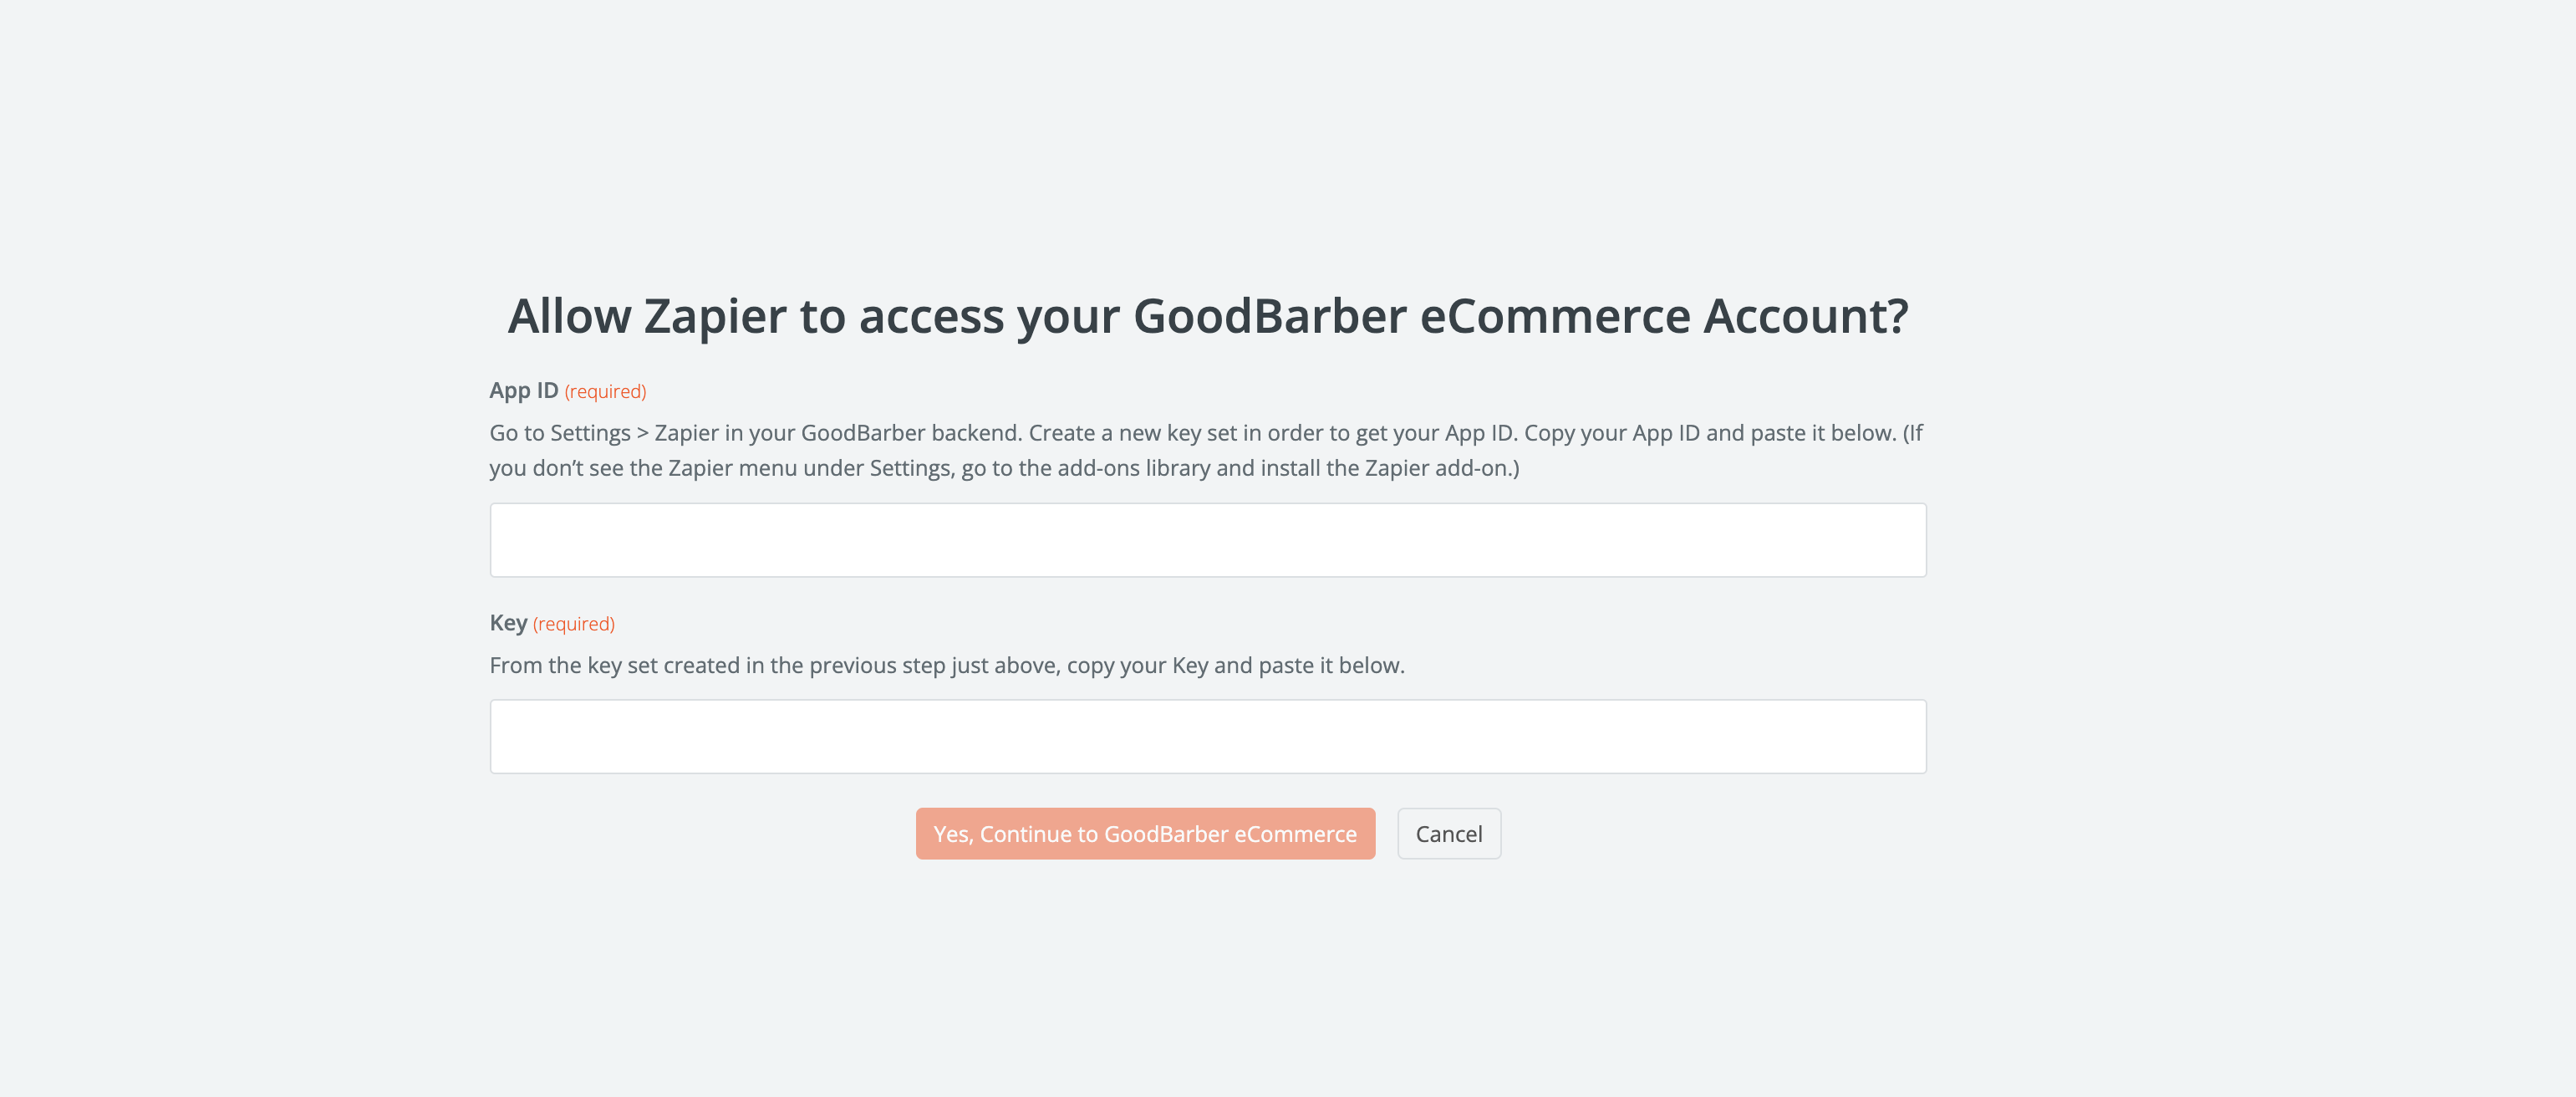
- Copy these two pieces of information and paste them into the corresponding fields on the Zapier platform.
- Click "Yes, Continue toGoodBarber eCommerce" to confirm the connection.
Step 4: Set Up the Action with Expedy Print
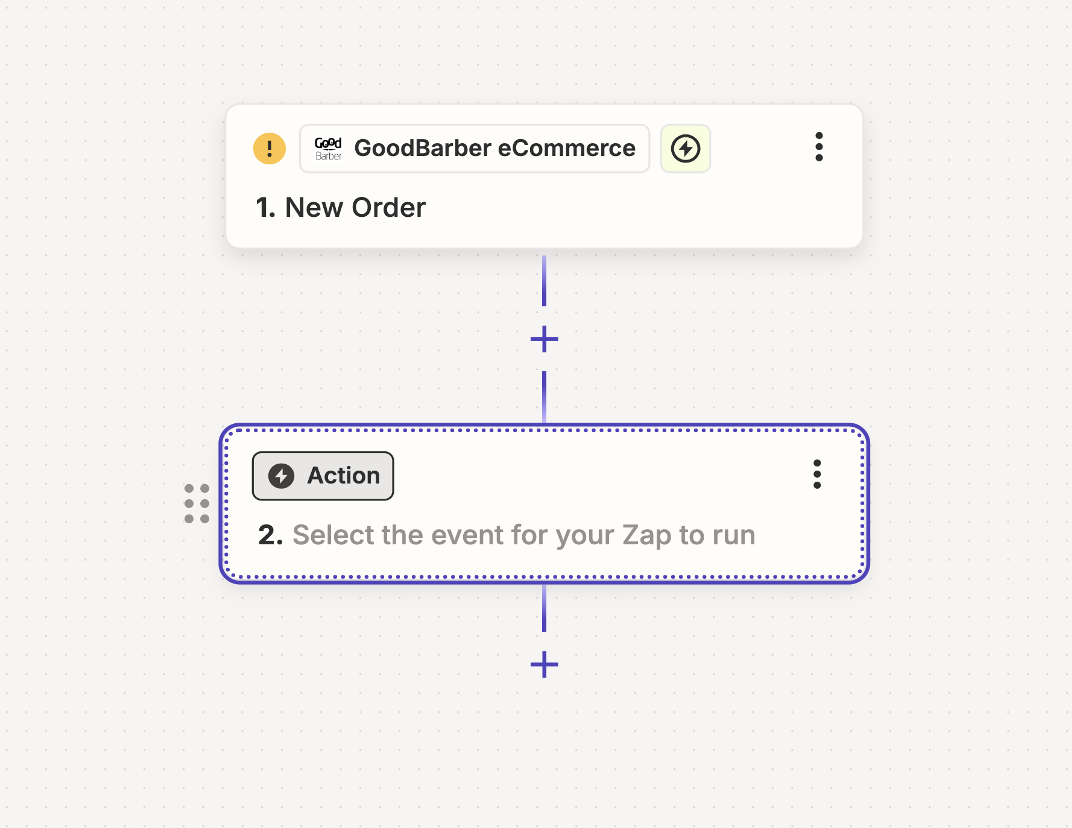
1. After setting up the trigger, proceed to the next step by selecting Expedy Print as the action app.
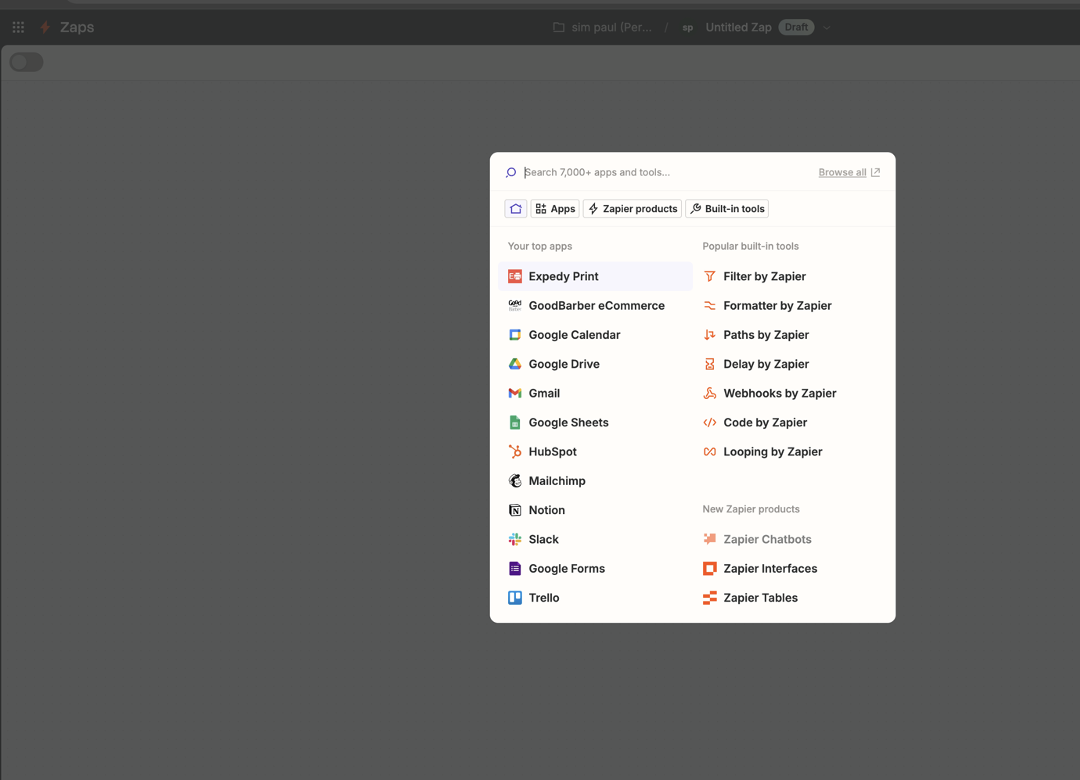
2. Select "Expedy Print" in the search bar and then choose the extension.
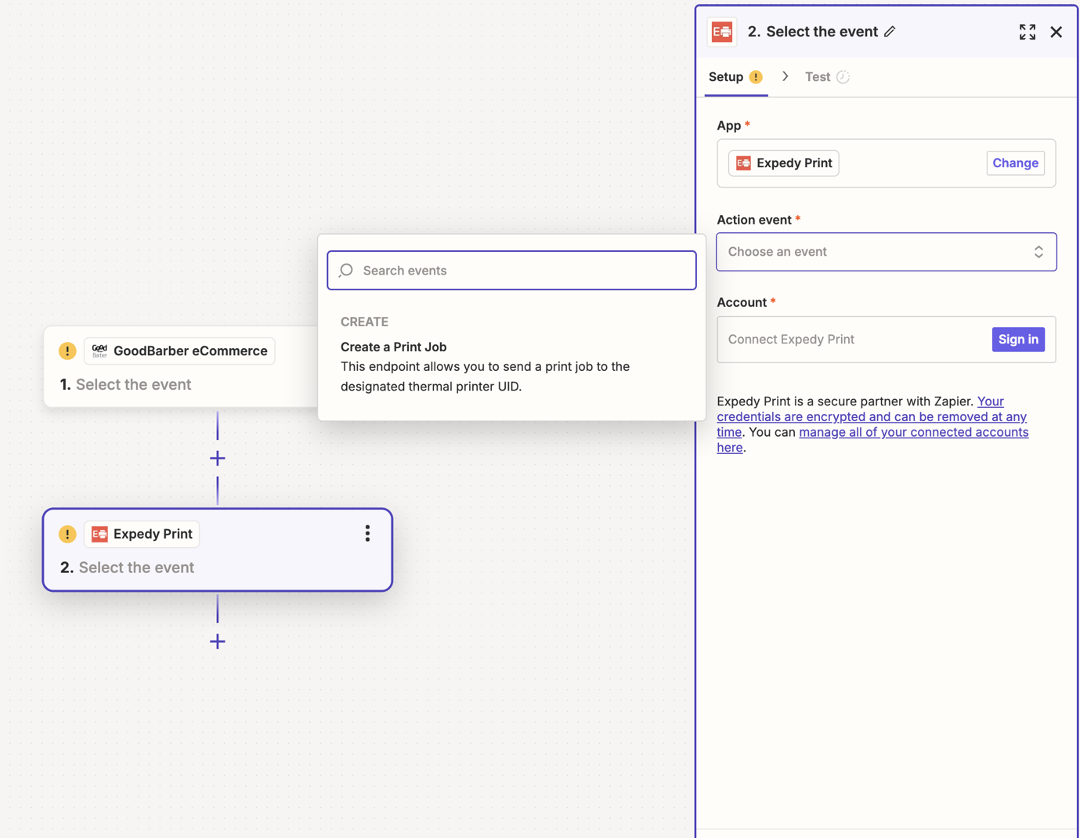
3. Choose "Create Print Job" as the action in the "Action Event" to be performed when the order condition is met in GoodBarber.
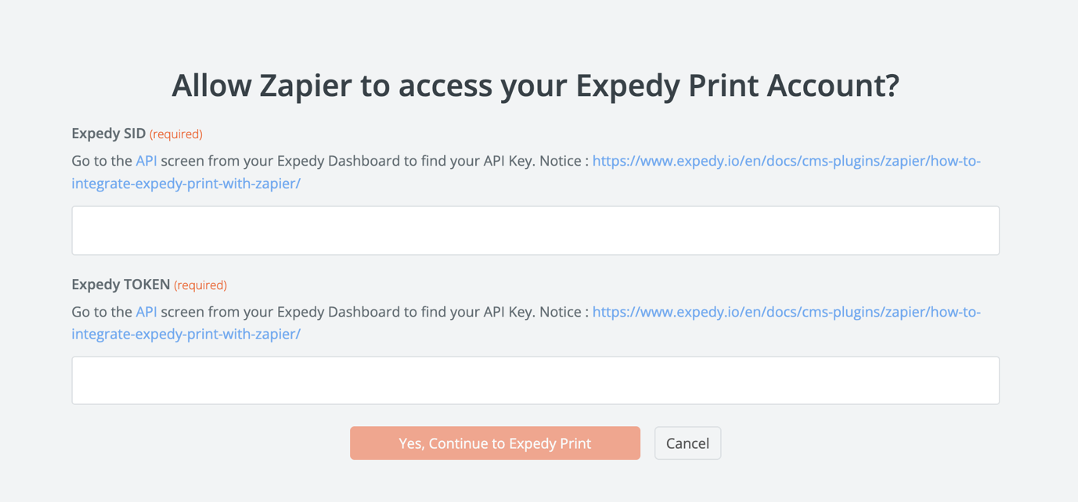
4. Connect your Expedy Print account to Zapier and map the essential fields such as product name, customization details, and the shipping address.
5. Click on "Yes, Continue to Expedy Print" to confirm the connection.
5. Click on "Yes, Continue to Expedy Print" to confirm the connection.
Step 5: Test and Activate the Zap
Test the integration to ensure everything is working correctly. Zapier allows you to send a test order to verify that the information is being correctly transmitted from GoodBarber to Expedy Print.
If the test is successful, activate your Zap by clicking on "Turn on Zap". This enables the automation to work with every new order.
If the test is successful, activate your Zap by clicking on "Turn on Zap". This enables the automation to work with every new order.
Print your first orders!
Thanks to this integration between GoodBarber eCommerce and Expedy Print via Zapier, you can automate the printing process of your orders, making the management of your online store much more efficient. Feel free to explore other integrations available on Zapier to automate additional management tasks within your store.
 Design