 Design
GoodBarber 4.5 – A new way to manage your content
Written by Muriel Santoni on

With GoodBarber 4.5 , we bet everything on your productivity. We thought about the best way for you to take advantage of the power of GoodBarber as intuitively as possible.
One of the biggest changes is the separation of the Content and Design menus.
Now, you are managing your content in one dedicated menu. Thus, the structure of your app is immediately shown when you enter the Content menu. The panel allows you to see, at a glance, the organization of your pages.
Moreover, to be able to edit your content from the beginning to end on the same screen, a new Content tab has been created at the top of the screen when you select the page you want to work on. When you click on that tab, you go from the page preview to the editor, on a full page. Create, modify, and organize your items from this new space, and preview your changes with one click.
Let’s review the new way to create your content together.
Create and manage your pages
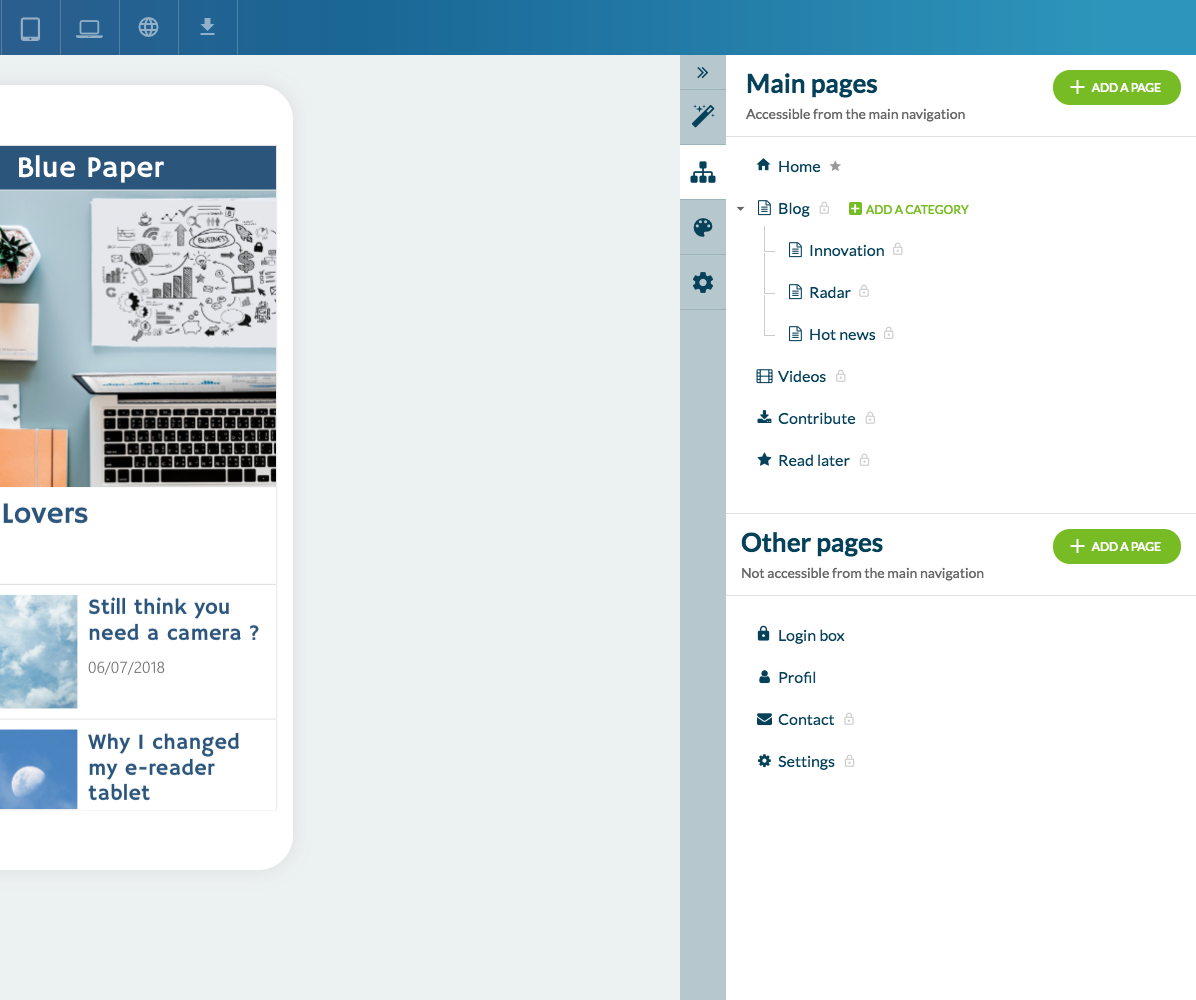
Your pages are the elements that compose your app. They are managed in the Content menu of the Builder of your app. This menu allows you to manage your pages entirely, modifying their order, or choosing their position among the Main Pages or the Other Pages.
This distinction will have an impact on your navigation mode. Indeed, the Main Pages are the pages you want to make available on your navigation mode. The Other Pages, while still accessible, won’t be available on the navigation mode. This function can be useful, for example, if you only want to have links to pages on the Homepage of your app.
In the case above, for example, the Profile, Contact and Settings pages can’t be entered directly from the navigation mode. Some of them are shortcuts in the navigation mode, others are only accessible from the Homepage.
It’s time to create the perfect navigation for your project, and the constraints are almost non-existent. To move a page from the Main category to Other, or vice versa, you just have to drag it from one category to the other.
When you skim through your pages in the panel, new actions are available: delete the page, or enter in the Settings of the page. There, you can change the name of your page, define the position of the content, and manage the publication in the app. Moreover, you’ll find options to activate comments, duplicate the page, modify the URL, and the content source.
The page creation is possible thanks to the actions buttons in the panel. There, you’ll have to choose which kind of pages you want to create.
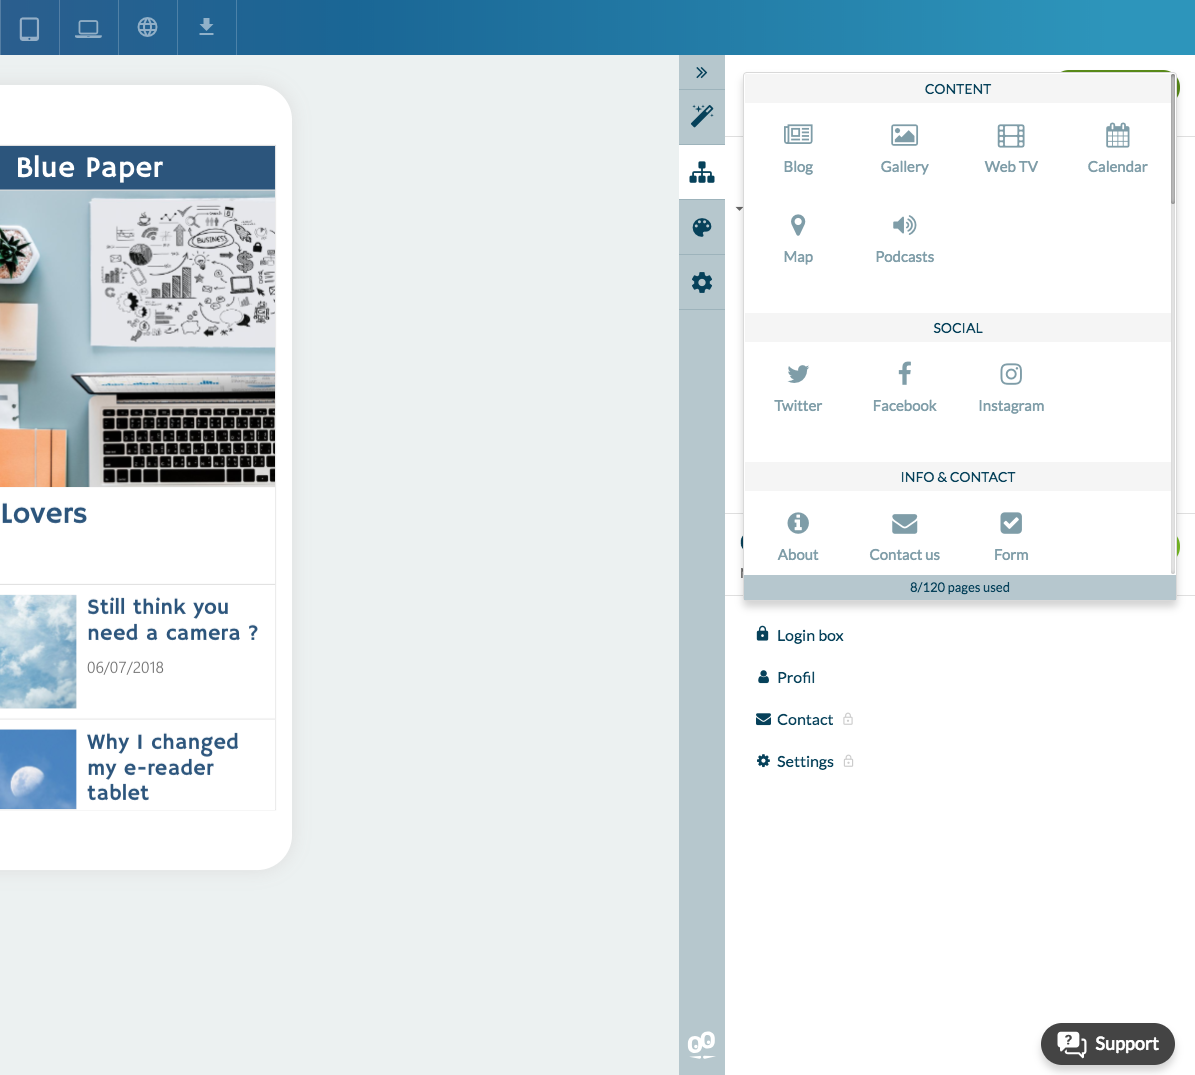
The selector opens to display the page types available. There are 7 page category:
You’ll find below a short video demo which will show you how to create and organize your pages:
- The content Pages: in which you can create your content with our CMS.
- The social Pages: they are useful to redirect your users to your various social network pages.
- The information Pages: they group the Contact, About and Form pages.
- The other Pages: these are the global pages such as Search, Menu or QR Code.
- The add-ons Pages: they are all the pages linked to advanced features such as the Loyalty Card, or the Users List.
- The external Plugins, which allow you to create pages related to external services: Facebook Events, Wordpress, Youtube, Soundcloud… You’ll find also custom pages (HTML or Click-to) which allow you to insert your own code or redirect your users to external websites.
- Finally, Pages with customized sources: in which you can use external feeds for articles, photos, videos, calendars, maps or sounds.
You’ll find below a short video demo which will show you how to create and organize your pages:
Create and optimize your content: the example of creating articles
To enter the editing phase, you just have to select the page in which you want to add content. In the example below, we’re going to add content in the “Blog” Page.
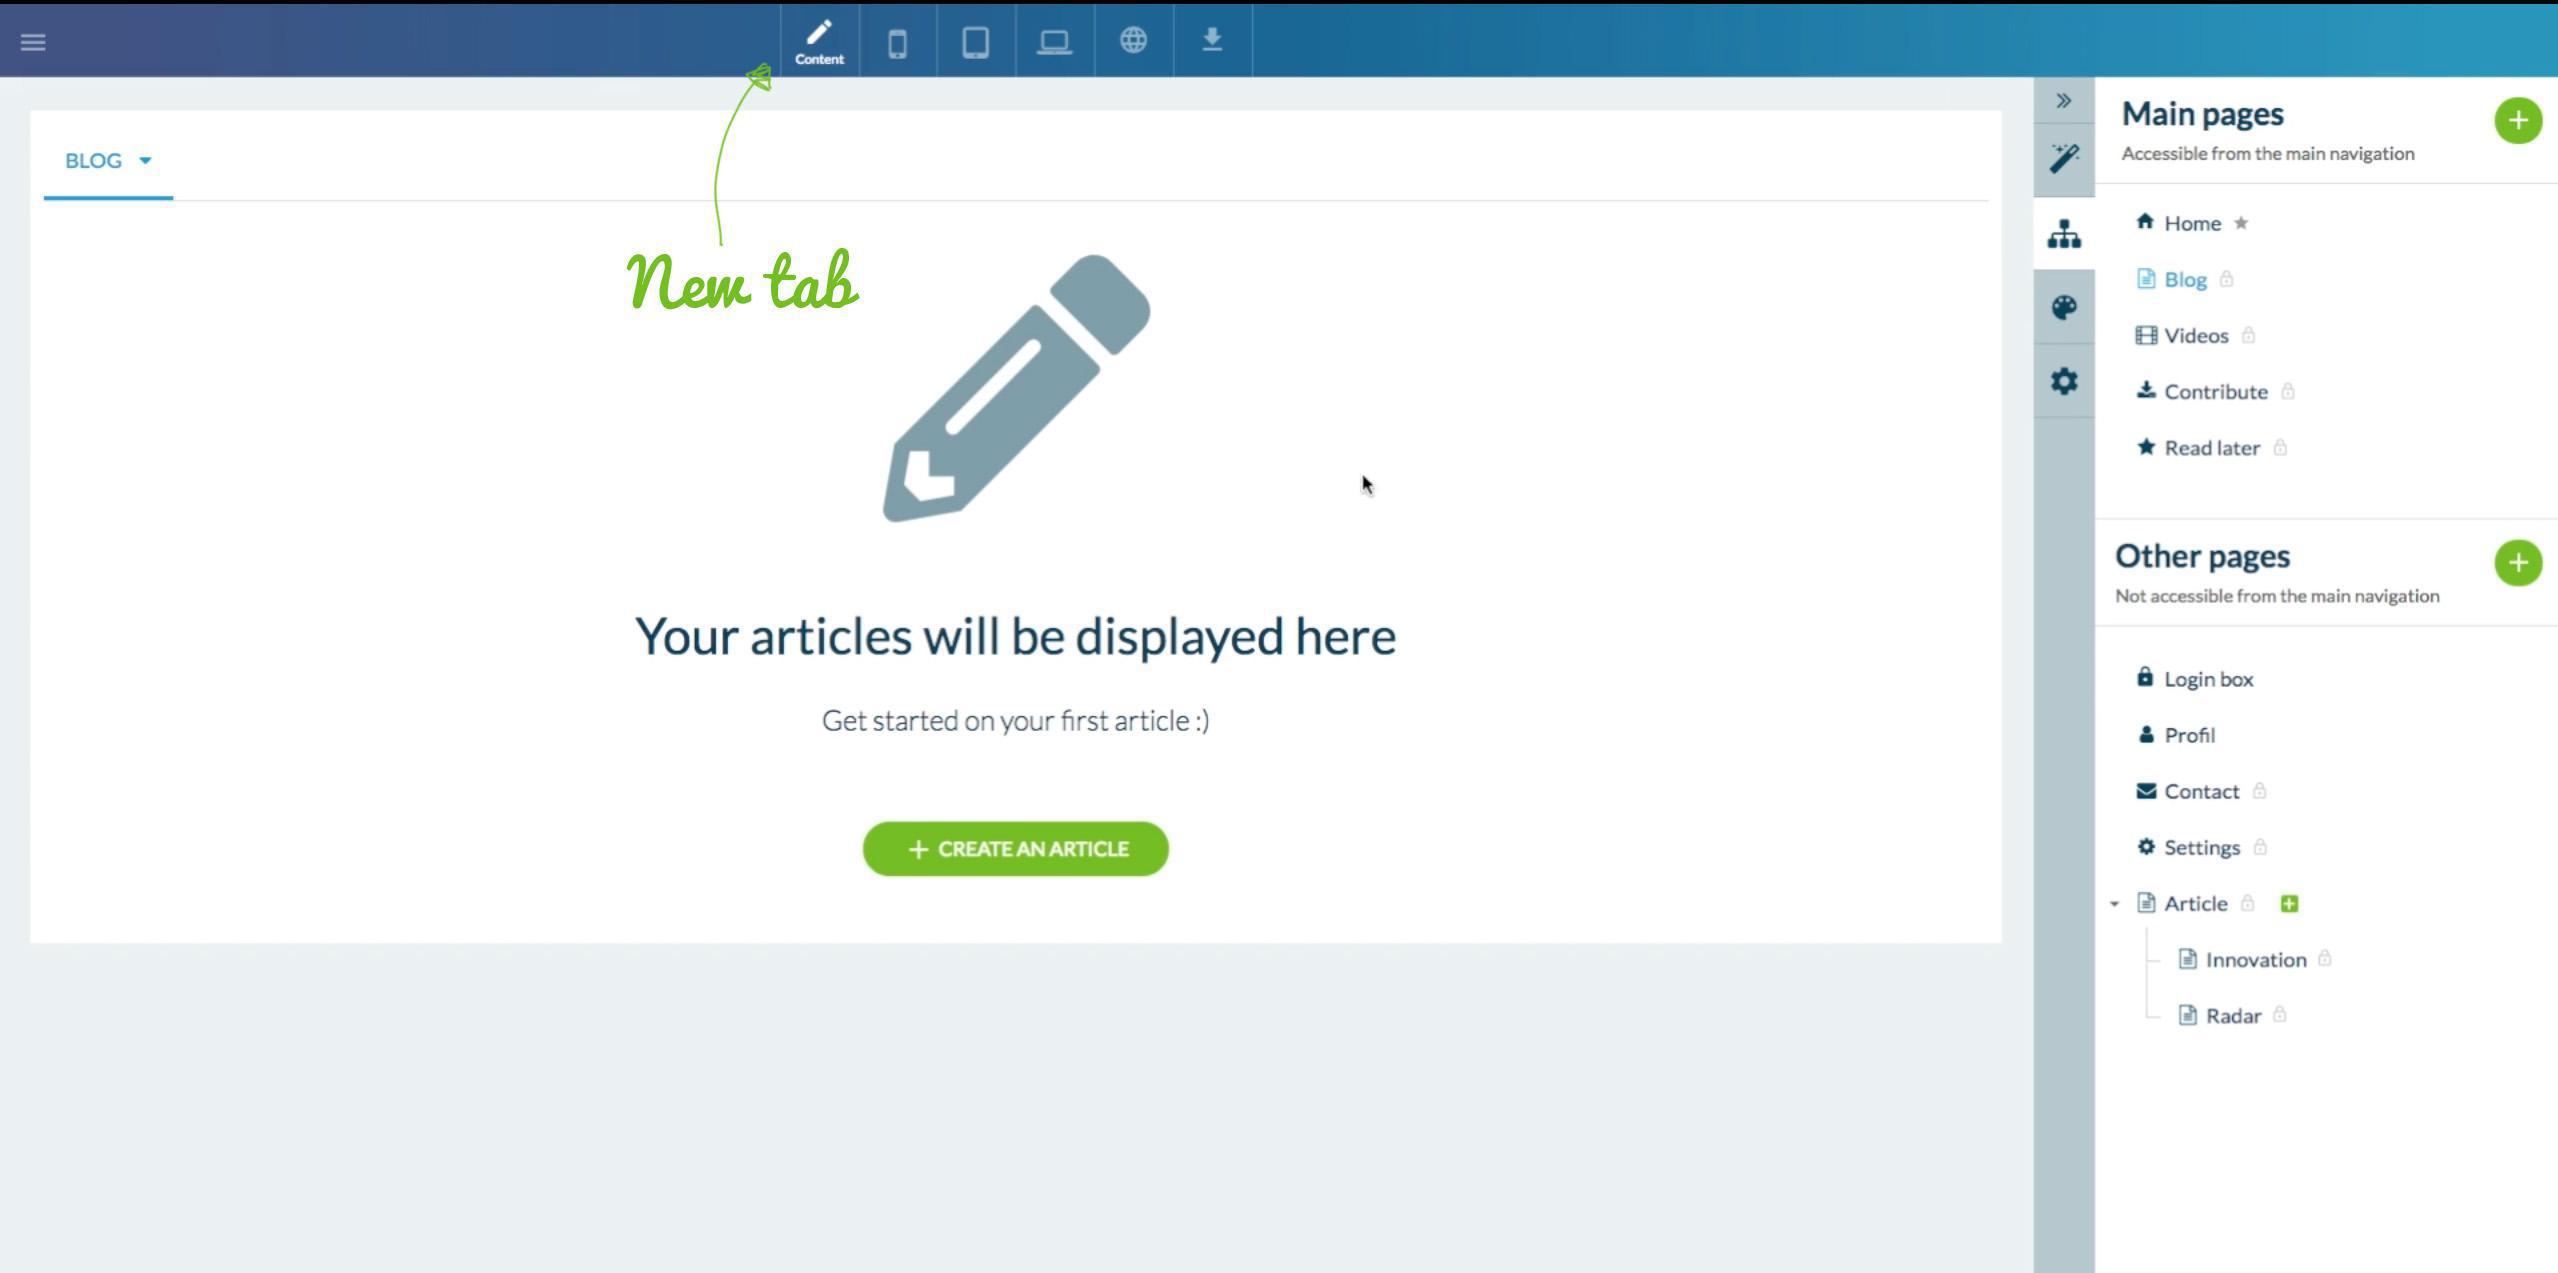
Once the page is selected, a new tab appears on the top of the screen. It’s the editing mode which allows you to create and manage your content, on a full screen. You just have to click on the action button “Add an article”.
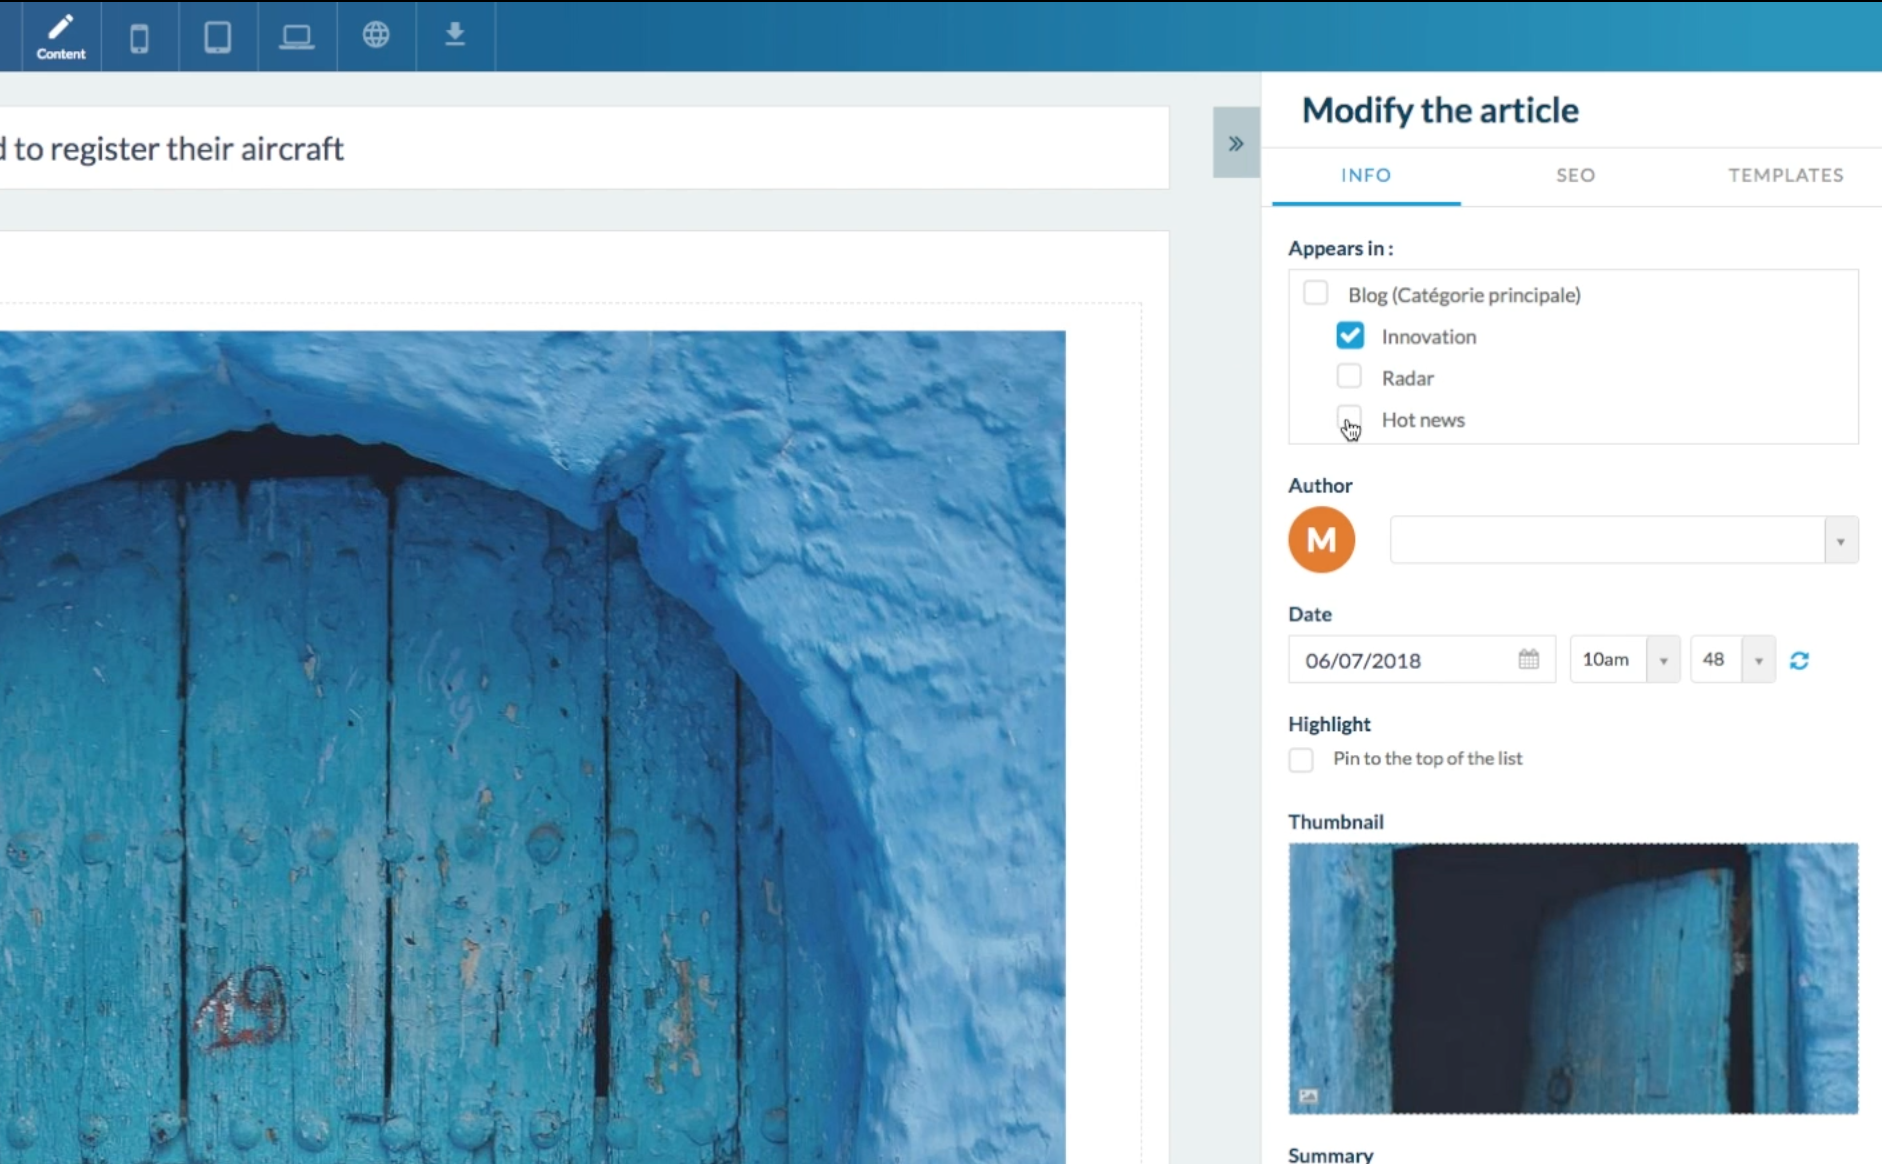
Add the title of your article and the content (text, photos, videos, citation). In the panel, on the left, various tabs are available:
At the top of the screen, various tabs allow you to visualize live how your article looks on all the different screens (smartphone, tablet or desktop).
Add the title of your article and the content (text, photos, videos, citation). In the panel, on the left, various tabs are available:
- The Info tab allows you to select the publication options: the page and the category related to the article, the author, the publication date, the article thumbnail or the summary, which will appear on the articles list.
- The SEO tab is the place where you can set up your article metadata: customize your item URL, insert your Title Tag (which is used to describe your content; it’s one of nowadays heaviest SEO factors) and your Meta Description Tag (which is used to give a description to search engines; when it’s qualitative, it can also increase your organic traffic to your content).
- The Template tab, where you can choose the way to show your article.
At the top of the screen, various tabs allow you to visualize live how your article looks on all the different screens (smartphone, tablet or desktop).
When your article is ready, you just have to publish it! You can also save it as a draft and schedule its publication, or put it in stock.
Manage your categories
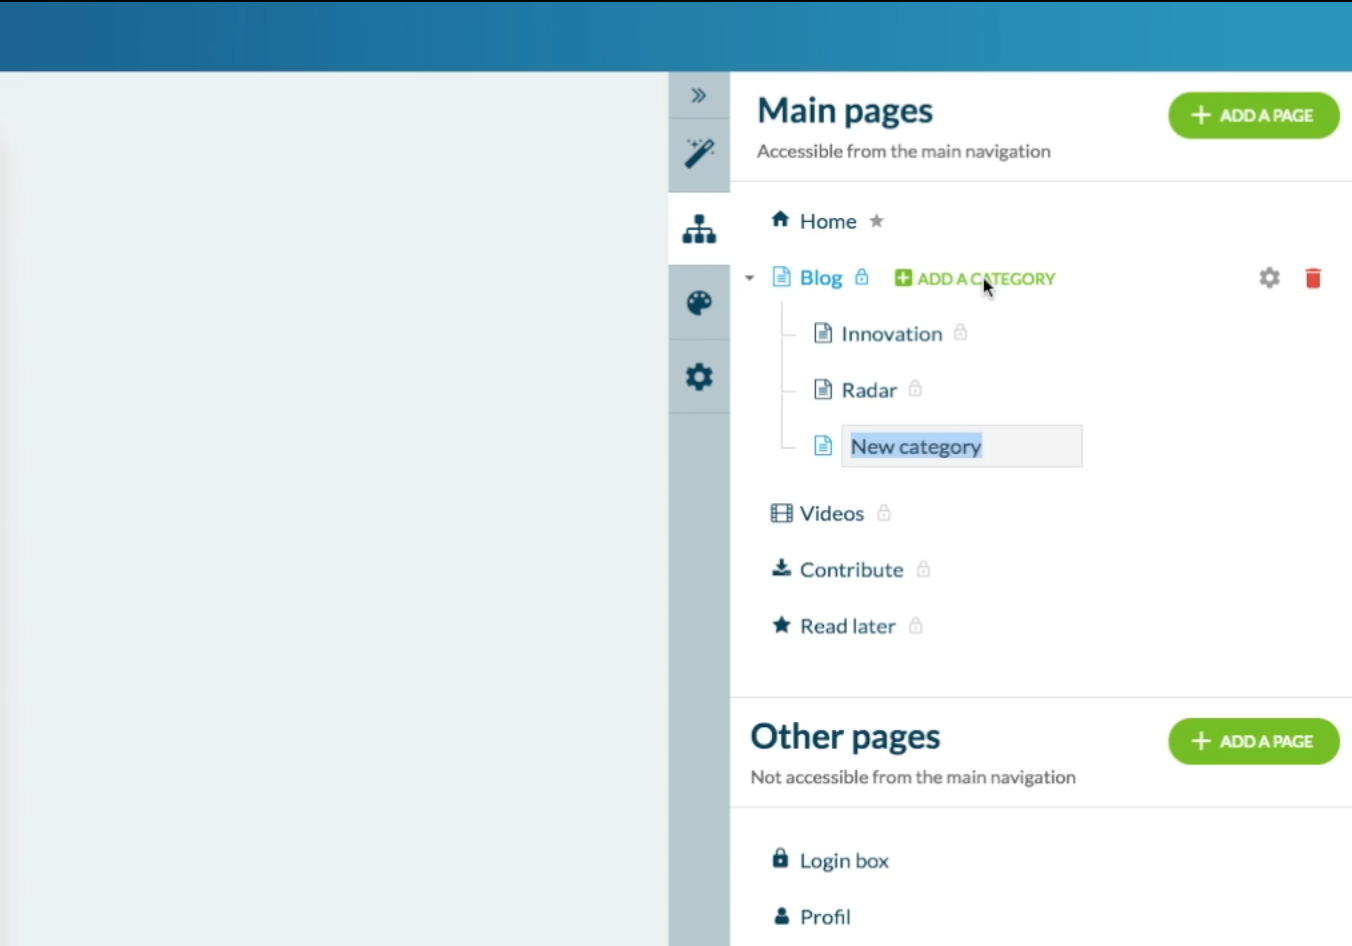
The items of your Content Pages can be classified into categories. To create them, you just have to mouseover the concerned pages in the panel on the left. If the category option is available, you’ll see a mention “Add a category” appear which will allow you to create your different categories directly in the panel.
Once you’ve created your categories, you can go to the builder editing mode. There, you can show the items of each category. Inside each item, the panel on the left allows you to select the categories in which it will be shown.
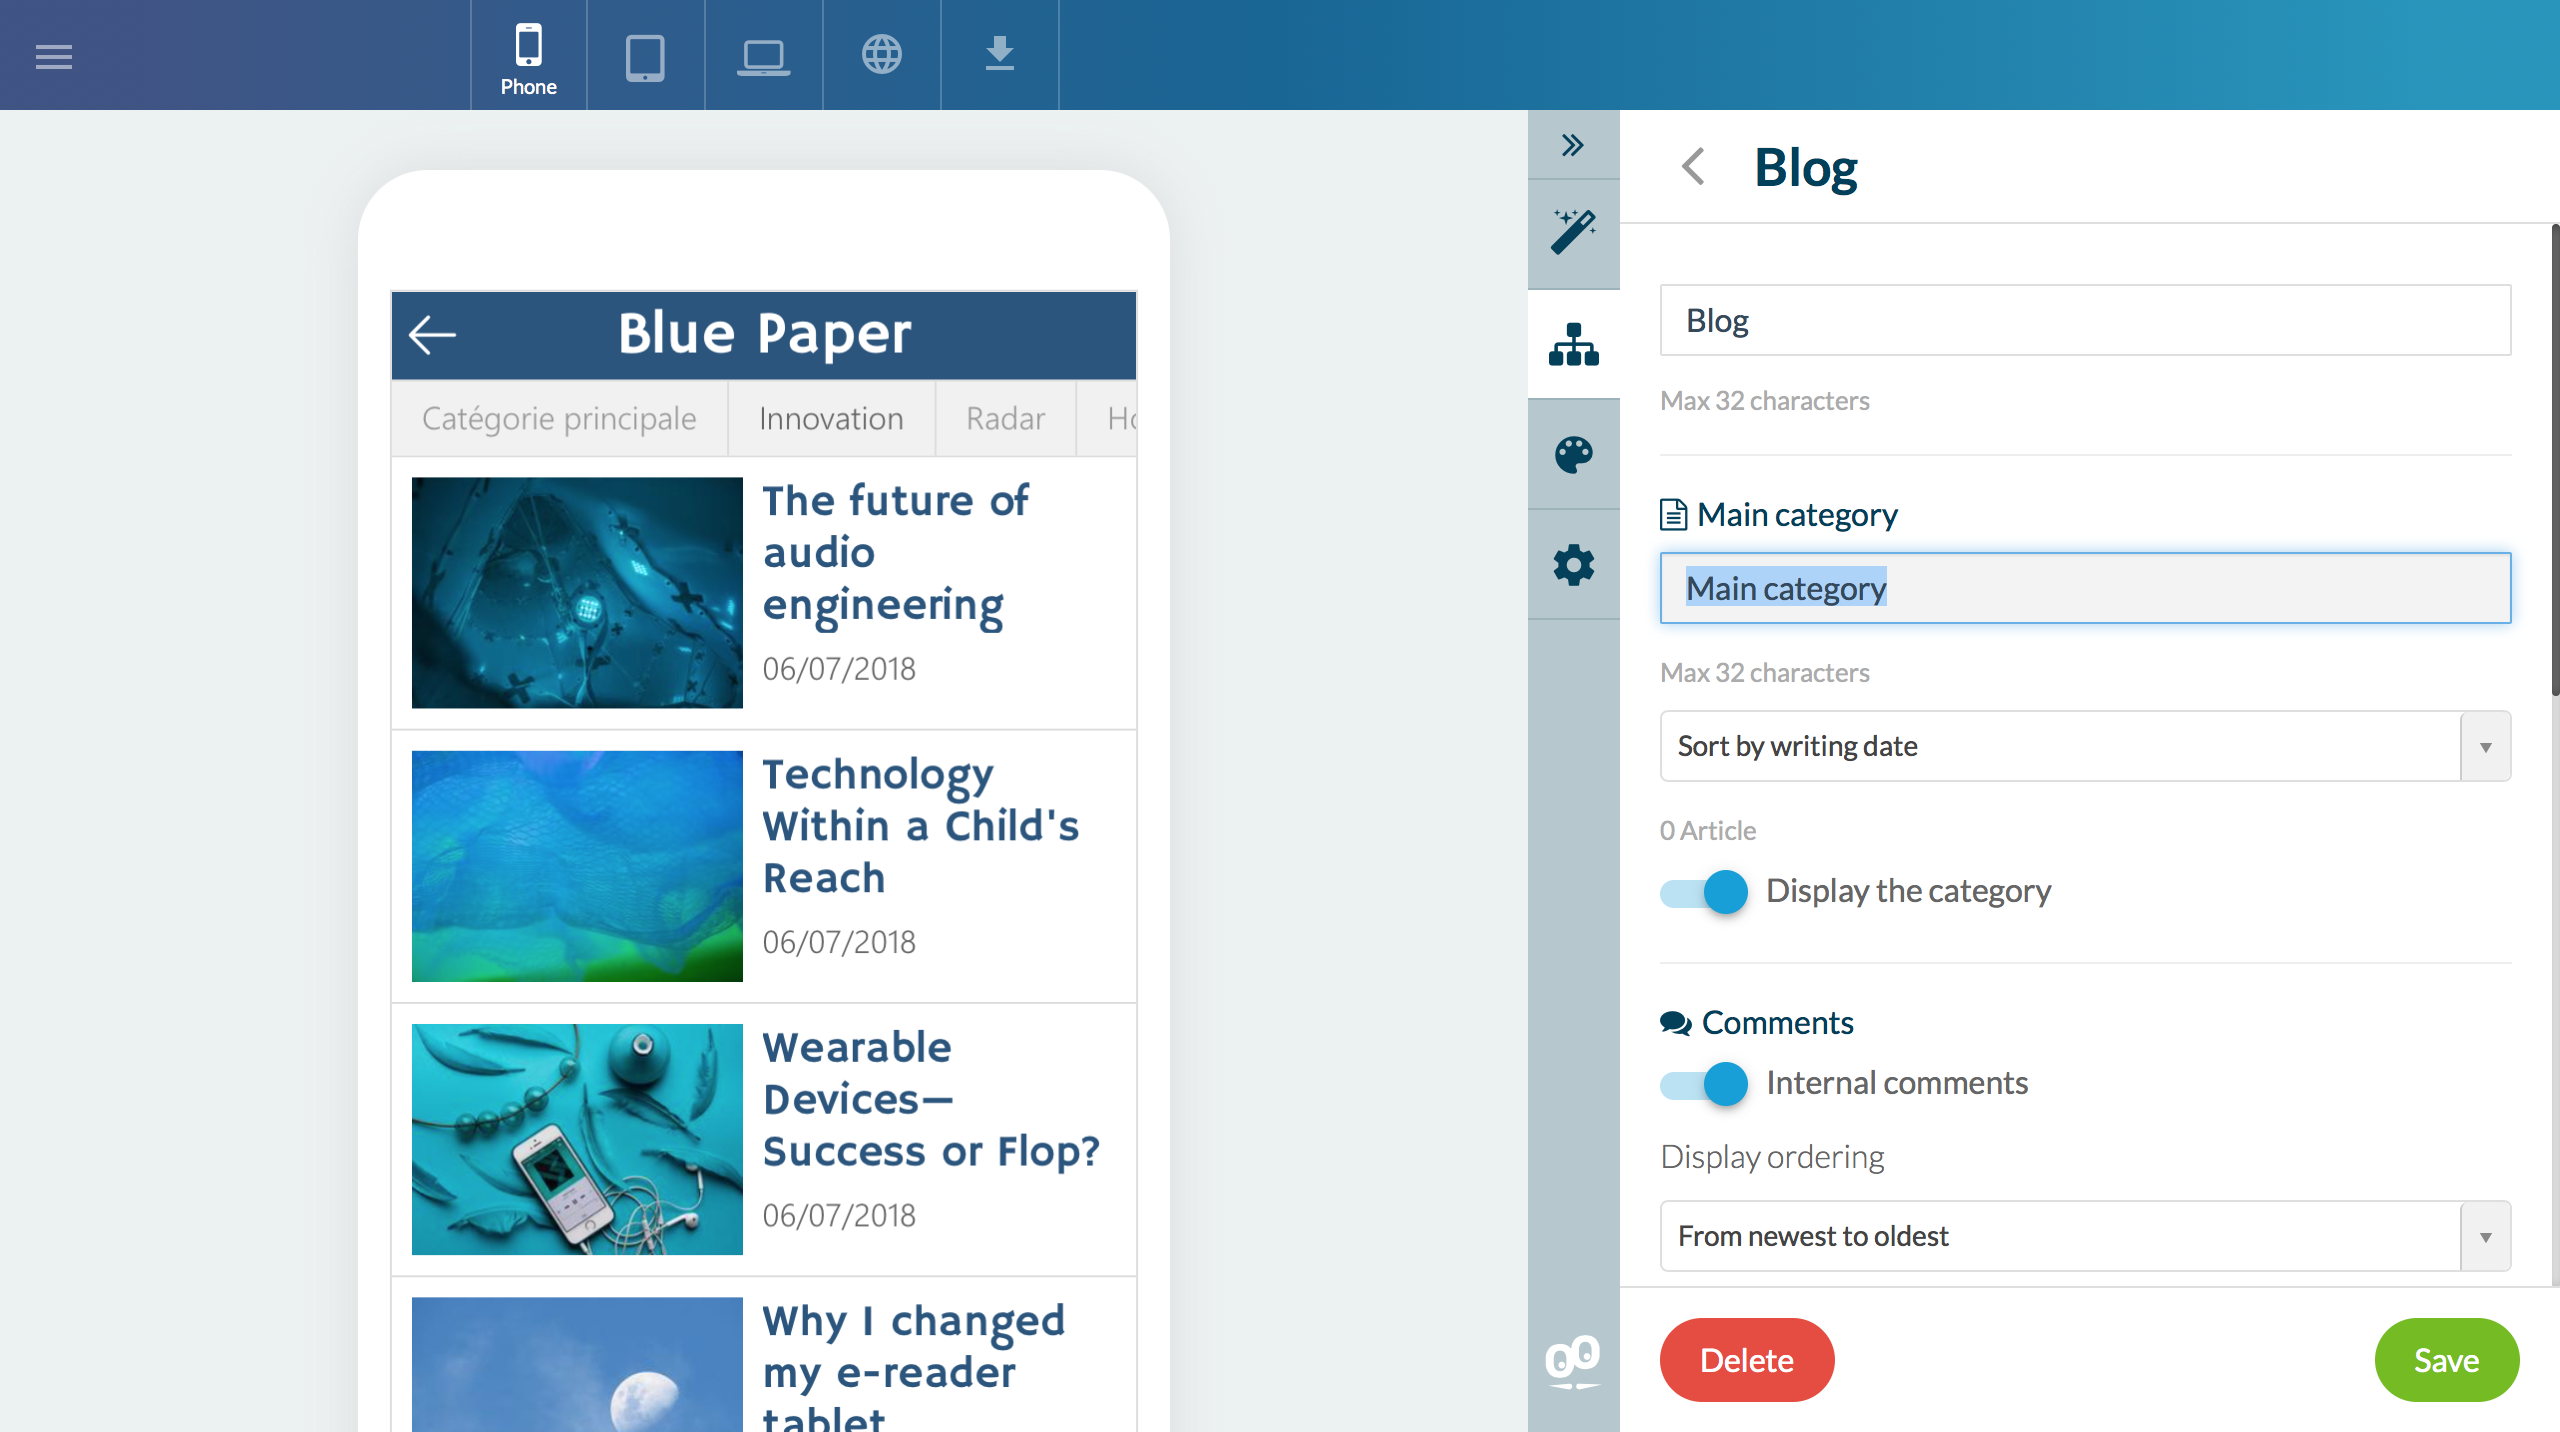
By default, the root of your page is named “Main Category” in which you can choose to include, or not, your article. You can modify this category in the Settings of your page. There, you’ll be able to modify the category title or to deactivate it.
Categories allow you to organize your content to make it more readable for your users and to retrieve your content more easily! Don’t forget that an item can be part of various categories at a time, and that you can create up to 15 categories per page.
Happy app building!
Happy app building!