 Design
How the Map section made my life in New York easier
Written by Stéphanie Guerreiro on
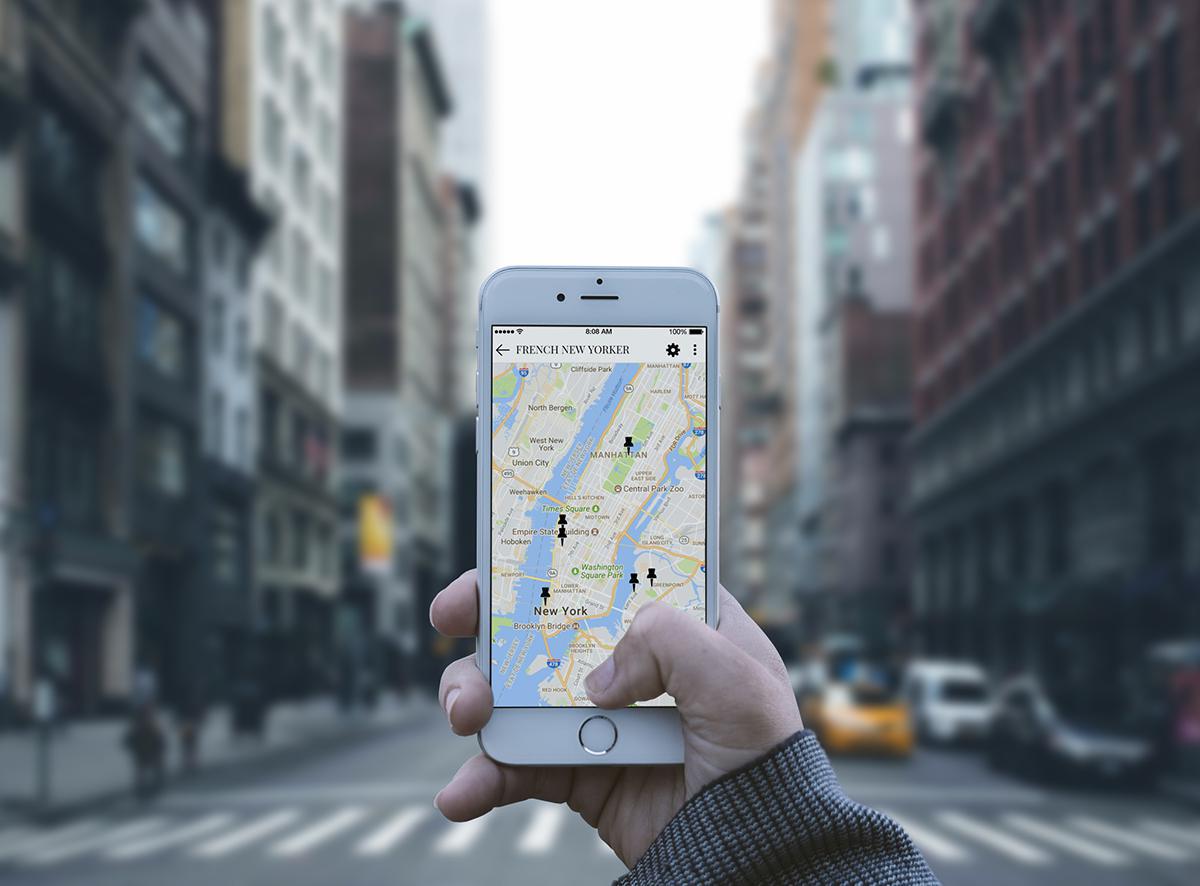
Moving to New York when you don't know anything about the city is a good way to be quickly impressed. There are so many things to do, so many restaurants to test, and places to discover. This is where city guide applications come in handy. The best brunch spots, vintage shops, famous hidden bars....an app can be a great sidekick for exploring a city.
Through a few solid examples from my own personal experience, this article is a testimony of my usage of the Map section in my day to day life in New York. In just a few points, I'll explain how to correctly set up your Map section by putting it into context, with a few prime New York spots as an added bonus ;)
Through a few solid examples from my own personal experience, this article is a testimony of my usage of the Map section in my day to day life in New York. In just a few points, I'll explain how to correctly set up your Map section by putting it into context, with a few prime New York spots as an added bonus ;)
General info on the Map section
You'll first have to produce points internally through the CMS, or externally by uploading a KML file. Then, you can choose to add routes (lines, surfaces) over your points if you'd like.
1) Producing points : how to gather your favorite spots in your app
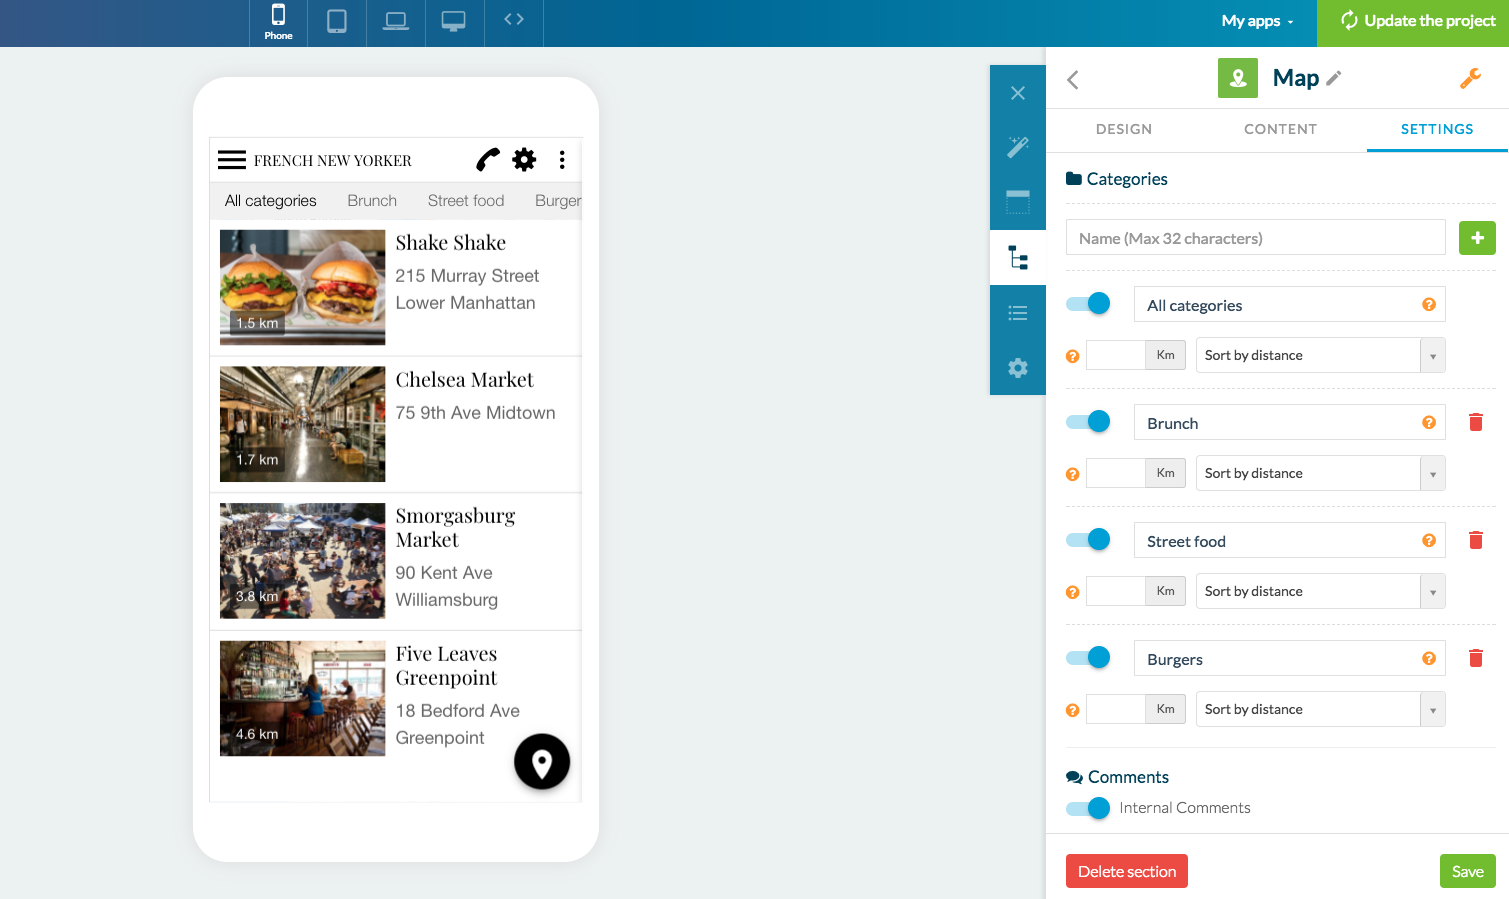
Before anything, you'll have to create the points that you want to appear on your Map. To do this, I think it's easiest to add the points directly from the back office through the CMS. This is how I entered the addresses of my favorite restaurants, bars, and spots in the indicated field (the latitude and longitude are automatically filled in).
Each point is also customizable–the option to customize icons is what especially comes to mind. You can choose from the GoodBarber library or upload your own image, as long as it's in .png format and white on a transparent background. Its size must also be between 150x150 and 150x300 px.
Your points are set up just like an Articles page; you also have the option to add text, embeds, videos, and photos–everything you need to enrich your Map and make it more interactive! I suggest you use the section to its maximum potential by adding other features to your Map like the search engine, Disqus comments, or even organizing your content by categories, which can be done by going to your Map section's Settings tab to create your categories. In my case, I focused on categorizing my favorite food spots all over New York City!
For those with advanced skills, I haven't forgotten about you!
You have the option to choose an external source to create your points. You'll have to upload a KML file with the points so your Map section can work correctly. To do this, you have two options :
- You can import a file previously downloaded onto your computer
- You can also use a URL by entering the corresponding URL in the indicated field
Comments :
- If you upload a KML file containing points, lines, and polygons under the "Points" zone of the section, only the points will be displayed on the map
- The KML section can handle a maximum of 1000 points. In order for the section to run properly, please don't add more than that.
- Only the first 100 map points will be displayed when the section is opened. To display the next 100 points, the user has to scroll down to the bottom of the list of places, and repeat this for the next 100 points, etc.
2) Adding routes over your points : how to highlight your favorite/upcoming paths
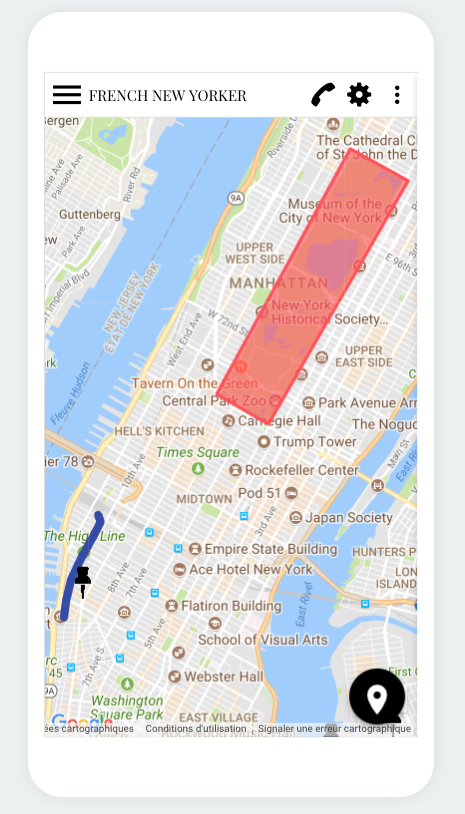
With all that New York has to offer, what's better than keeping track of different routes you want to do in the city or highlighting certain zones you want to visit? With a little bit of XML language knowledge, you can (with the help of a KML file), display lines and polygons on your Map.
Here is an example of code with the KML structure that you can follow to display these properties on your map.
Here is an example of code with the KML structure that you can follow to display these properties on your map.
<?xml version="1.0" encoding="UTF-8"?>
<kml xmlns="http://www.opengis.net/kml/2.2">
<Document>
<Placemark>
<name>Line</name>
<Style>
<LineStyle>
<width>10</width>
<color>ff00ffff</color>
</LineStyle>
</Style>
<LineString>
<tessellate>1</tessellate>
<coordinates>
8.9648438,42.1634034,0.0
-4.3945312,39.6395376,0.0 -117.5976562,57.4212944,0.0
-112.6757812,36.3151251,0.0
-50.9765625,-15.2841851,0.0
24.2578125,-4.5654736,0.0
133.4179688,-22.268764,0.0
101.953125,36.7388841,0.0
39.7265625,58.9953112,0.0
-1.7578125,52.8027614,0.0
9.2175293,42.2366519,0.0
</coordinates>
</LineString>
</Placemark>
<Placemark>
<name>Polygon</name>
<Style>
<LineStyle>
<width>3</width>
<color>ffff00ff</color>
</LineStyle>
<PolyStyle>
<color>ff000000</color>
</PolyStyle>
</Style>
<Polygon>
<tessellate>1</tessellate>
<outerBoundaryIs>
<LinearRing>
<coordinates>
-101.2703028084182,44.03484070243132,0
-93.50548036075496,32.23807715431979,0
-81.86615113861016,38.17061241766041,0
-101.2703028084182,44.03484070243132,0
</coordinates>
</LinearRing>
</outerBoundaryIs>
</Polygon>
</Placemark>
</Document>
</kml>
I wanted to create a red polygon for Central Park and trace the route of my favorite walk in Manhattan in blue : the High Line.
To display lines and polygons, whether you use the CMS or an external source, you'll have to upload your KML file into your back office. If you choose the CMS, you can do it from the section's Settings tab, then download your file under "Routes".
Have fun exploring and Happy App Building :)
To display lines and polygons, whether you use the CMS or an external source, you'll have to upload your KML file into your back office. If you choose the CMS, you can do it from the section's Settings tab, then download your file under "Routes".
Have fun exploring and Happy App Building :)