The Search Section
Written by Jerome Granados on
The Search section is one of the updates in GoodBarber 4.0
It is a whole new section that offers several options for carrying out searches within your app and website.
It is a whole new section that offers several options for carrying out searches within your app and website.
Benefits of a search section
In the previous version of GoodBarber, it was possible to activate a search feature inside a content section, which meant that an input field would appear only inside the concerned section. We decided to take this a step further and to enhance the search possibilities.
To do this, we transformed the search engine in your app into a section of its own. There are several ways in which it can be accessed: through a shortcut in the NavBar, a shortcut in the menu, through principal menu entry, through a link in an article, etc.
The other advantage is that the search is no longer linked to one section in particular. It's now possible to display results that come from multiple sections.
Access the search
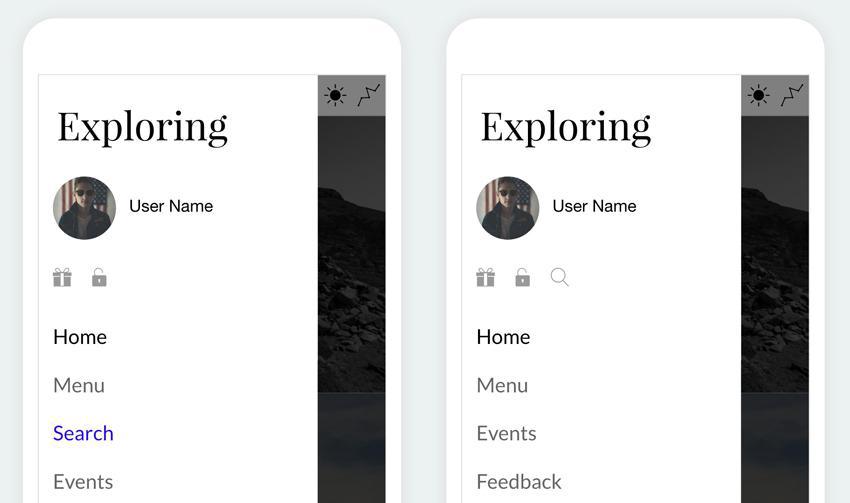
You have a lot of flexibility when giving your users access to the search engine. Here are a few of the most popular options amongst the many existing ones:
From the Menu
Each navigation mode offers several spots where you can display links that direct the user towards sections of your app. Since the search engine is just another section, you will manage it just as you would with any other normal section.
Take the example of the "Swipe" menu. I can create a passage to the search section in the primary navigation. I can even make this passage stand out by applying a different color to the font, by adding a background color, or by displaying an icon.
On the other hand, if I prefer to take the search out of the primary navigation, I can always add an element that represents it into the header or footer of the swipe.
There are a huge amount of possibilities.
From the NavBar
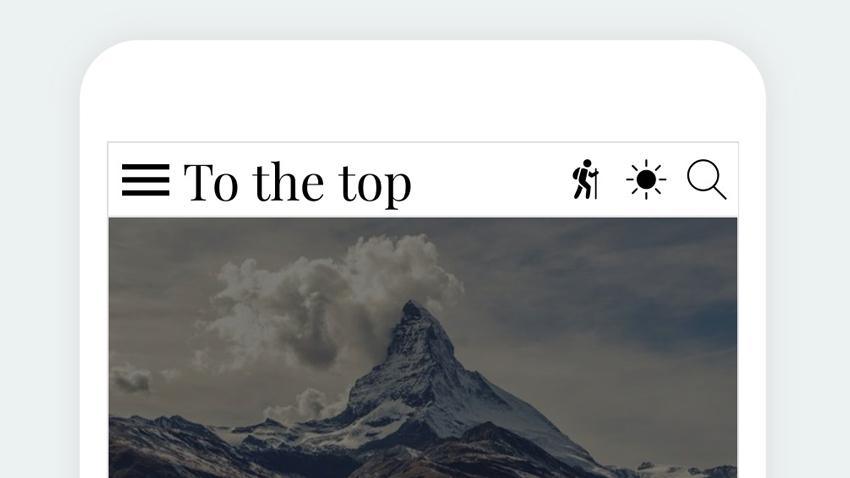
If you want the search engine to be accessible form the majority of screens in the app, I suggest you add a shortcut into the NavBar. This shortcut can be in the form of an icon, a link, or an action button. It's up to you to decide how you want it to appear in each device (phone, tablet, desktop).
By default, when you set up the header in your NavBar, the settings are extended to all sections of the app. If you need a specific design for one section in particular, remember that you can achieve that by going to the "Header" menu in the design of the section in question.
Search settings
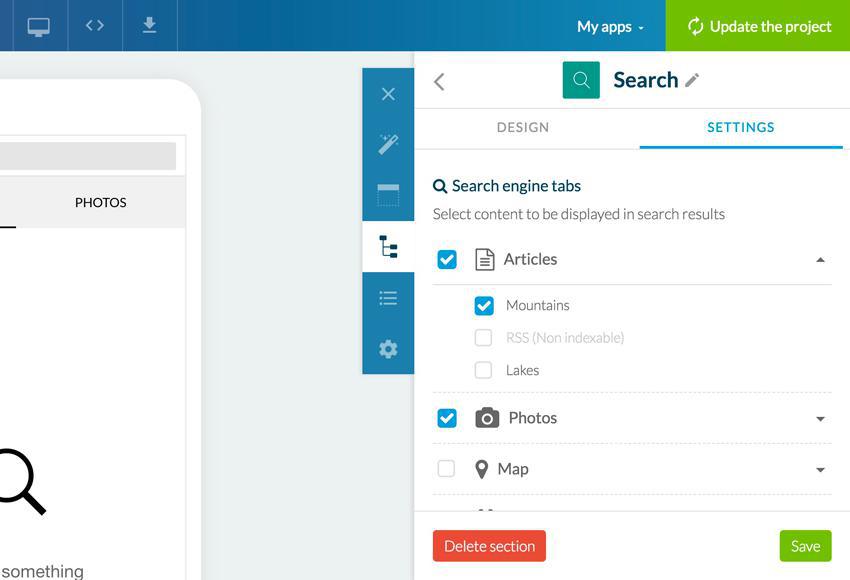
In the settings of the Search section, you can choose which areas the search engine can pick up results from.
The panel automatically lists the possible areas, which are organized by content type (articles, videos, photos, events, sounds, map).
For each category, you can even select the sections in which the search will be activated. In the example below, I decided to activate the search in all the photo sections of my app, but for the articles, only in the "Mountain" section. Remember that if it's not technically possible to carry out a search in a section, this section will not appear as a selectable option in the panel. This is the case for the RSS section in my example.
Displaying results
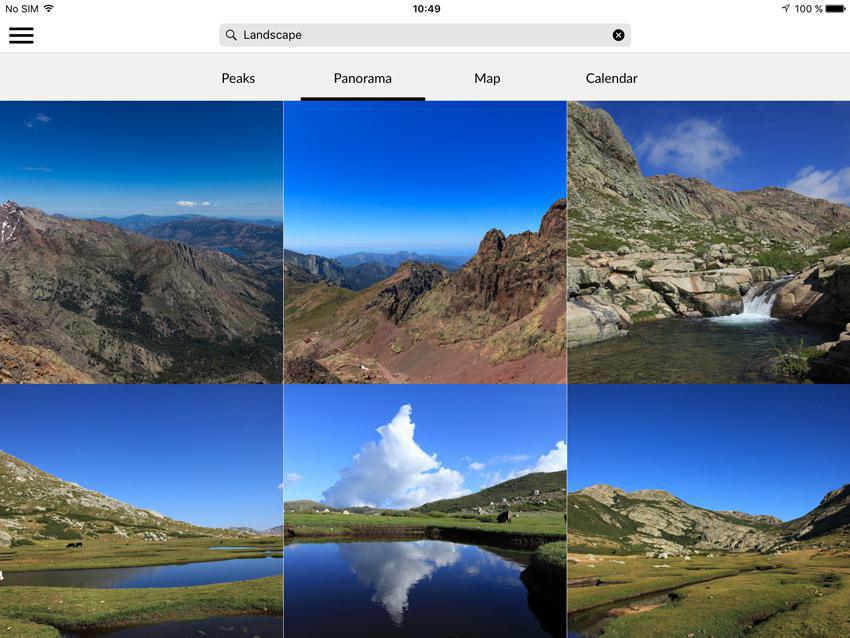
The search section has 2 screens.
The first screen allows a user to search a term and to see the associated results.
An entry field, at the top, allows you to type the search term. If this search has already been made, its history will appear. The user can quickly choose an existing search term from this history.
The results are sorted by content type and are displayed in tabs. Each tab corresponds to a category of content. By default, the tabs have the names of the categories on them : articles, photos, videos, events, sounds, maps. You have the option to rename them if you want, as done in the example below in certain tabs.
The second screen allows you to take a look at the details of a result. You can set up its toolbar to present possible actions to the user.
Several search engines
Last thing, keep in mind that you can add several search sections to your app.
This gives you the option to have a search engine in the header of each section of your app that would only pick up results from a specific area, for example. This is a good way to replicate the functionality of the search engine in the previous versions of GoodBarber, if needed.
This gives you the option to have a search engine in the header of each section of your app that would only pick up results from a specific area, for example. This is a good way to replicate the functionality of the search engine in the previous versions of GoodBarber, if needed.
 Design