GoodBarber's Online Help
Android - Build your app and test the ad hoc version
Start the process
If you'd rather our team to take care of it, you can subscribe to the GoodBarber Takes Care Service (GBTC)
In both cases (Solo or GBTC), in order to build your Android test app, you must own a Google Publisher account .
Google uses different platforms, you'll need to access 3 of them to build your Android app:
- Google Cloud console
- Google Play console (requires a paid Google publisher account)
- Firebase Console
We recommend to use the same email to create projects and apps on all those platforms.
Solo Mode:
Below you'll find the necessary steps for building your Android application yourself. After going through this process, you will be able to test your native Android app on your device before submitting it to the Google Play Store.
Go to the page Sales Channels > Android App > Publish .
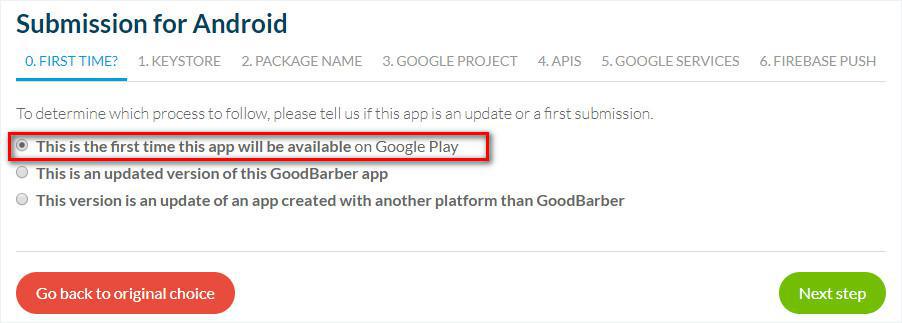
0. FIRST TIME?
- This is the first time this app will be available on Google Play - choose this option if you publish your app for the first time.
- This is an updated version of this GoodBarber app or choose this option if you are updating an existing app already published on Google Play.
1. KEYSTORE
Go through this step only if you are updating an existing app already published on GooglePlay and you have the Keystore file.
How can I get the Keystore file?
If you have made your application with another app builder competitor of GoodBarber, you must ask them to give you the keystore file.
What if I don’t have the Keystore file?
If you cannot get the Keystore file, please select This is the first time this app will be available on Google Play and your app will be published as a completely new app.

2. PACKAGE NAME
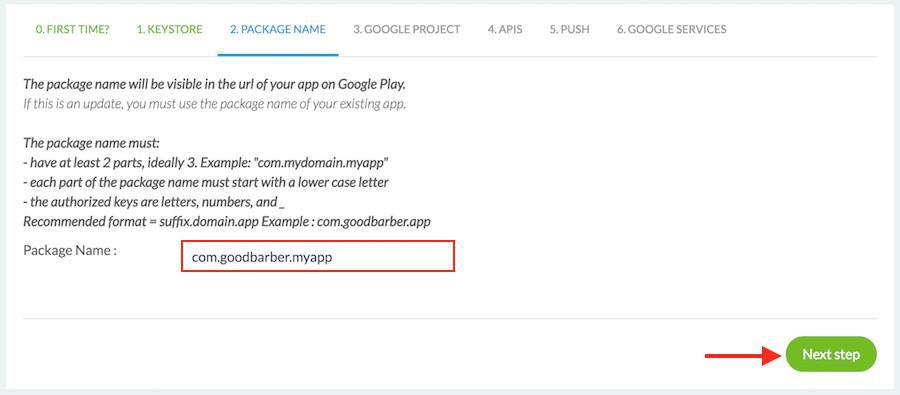
The process automatically takes you to step 3. However, you can edit your the Package Name in Step 2.
By default, your package name is set as follows: com.goodbarber.yourprojectname
Warning: it appears in the Store URL of your app on Google Play.
Example:
If the name of your GoodBarber project is myapp, the package name will be com.goodbarber.myapp.
The store URL will be: https://play.google.com/store/apps/details?id=com.goodbarber.myapp
To modify the package name:
1 - Go back to step 2. PACKAGE NAME
2 - Edit the package name according to these requirements: Android - Edit the package name of the app
3 - Click Next step
Authentication to the Google Cloud Console
Go to your Google Cloud console.
Your credentials are the same as the ones you use to login to your Google account. If you are already logged in to your Google environment, you directly have access to the Google Cloud Console.
In case you don’t have any Google Account, create one to continue this process.
Create a Google API project
1. Click "the projects list"

2. Click on NEW PROJECT

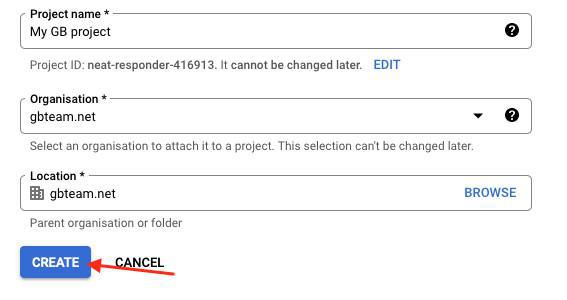
3. Define a Project Name
4. Select the Organization to attach to your project
5. Select its Location
6. Click on Create
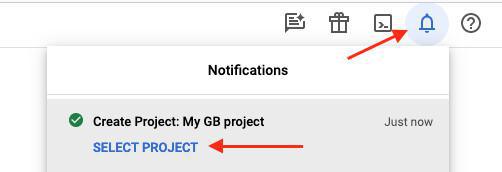
7. Open the project from the notification icon in the toolbar
Enable the APIs
1. Click in the left-hand menu API and services > Library
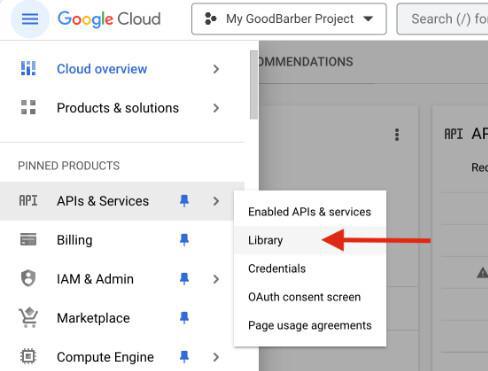
2. Search and enable these API services from the API Library :
- Search for Maps SDK for Android in the API library
- Click the Enable button
- Go back to the API Library
- Search for Firebase Cloud Messaging in the API library
- Click the Enable button
- Go back to the API Library
- Search for Firebase Installations API in the API library
- Click the Enable button
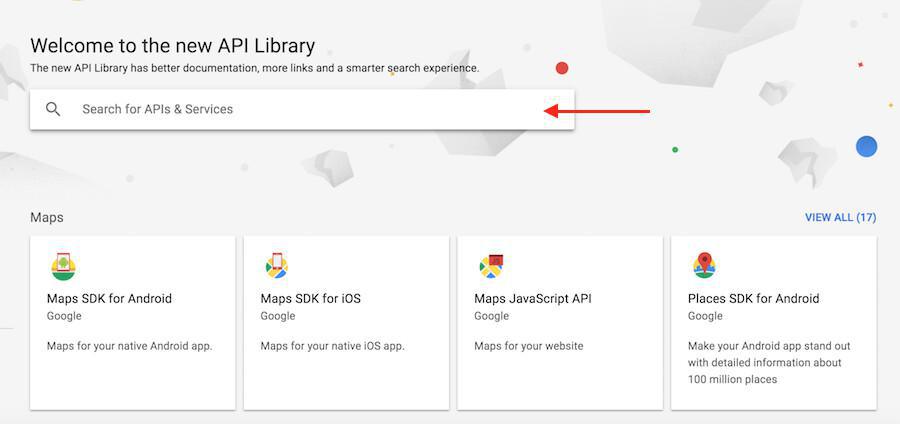
If Google suggests that you try the Google Maps platform, return to the Google Cloud console of your project.
Verify the enabled APIs
1 - Go back to the menu API & Services > Dashboard
2. Make sure the 2 APIs Maps SDK for Android and Cloud Messaging are enabled in the API list
Create your app on Google Play Console
1. Login to your Google Play console
2. Select "Home"
3. Click "Create app".
4. Fill in your app details (App name, default language, select App for App or Game and Free or paid)
Indicate if your app will be downloaded for free or for a price you will determine*.
5. Check the declarations boxes (Content guidelines and US export laws)
6. Click "Create app"
*To publish paid applications, you will be requested to set up a merchant account .
Click on the link provided in your Google Play console and follow Google's instructions.
WARNING: You can never change a free app into to a paid app!
If you set your app for FREE on the Play Store, it's forever!
You can change a paid app into a free app - but once it's changed to "free", it can never be changed back to "paid".
SHA-1 certificate fingerprint
1. Individual developer accounts: Go to the menu Test and Release > Testing > Closed testing, then click "Manage track" next to "Closed testing - Alpha"
or
Organization accounts: Go to the menu Test and Release > Production
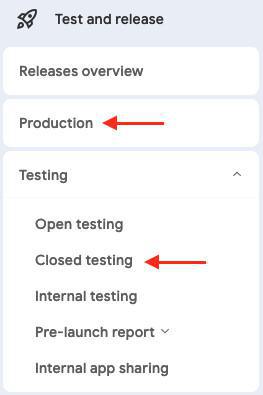
2. Click "Create new release"
3. Go to the menu Test and Release > App Integrity: Scroll down to Play App Signing and click "Settings"
4. Click the copy icon next to the SHA-1 certificate fingerprint
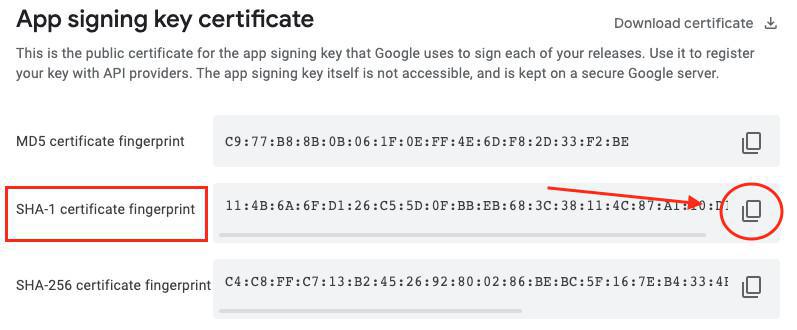
5. Paste this SHA-1 certificate fingerprint into the dedicated field on your GoodBarber back office .
SHA-256 certificate fingerprint
Still from Google Play menu Test and Release > App integrity > App Signing
1. Click the copy icon next to the SHA-256 certificate fingerprint
2. Paste this SHA-256 certificate fingerprint into the dedicated field on your GoodBarber back office .
3. Click "Next" in your back office GoodBarber to reach step 5.3 of the Android compilation process.
Create an Android key on Google Cloud console
Go back to your Google Cloud console, select the project linked to this app.
1. Go to API & Services > Credentials
2. Click "Create credentials > API key"
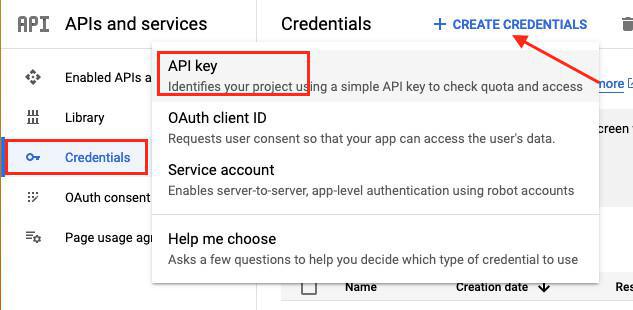
An API key is generated.
3. Click "Edit API Key"
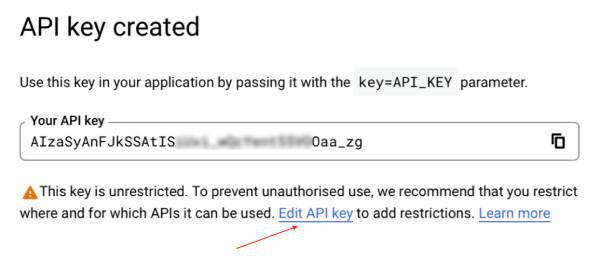
5. Replace the default name with "Android Key"
6. Select Android apps under Key restrictions
7. Click on “Add package name and fingerprint" (Needs to be done twice, once for each SHA-1)
8. Copy the Package name and SHA-1 certificates fingerprint provided at the 5.3 step of the process in your back office GB and paste them on the Google Cloud console to restrict usage to your Android app with 2 items.
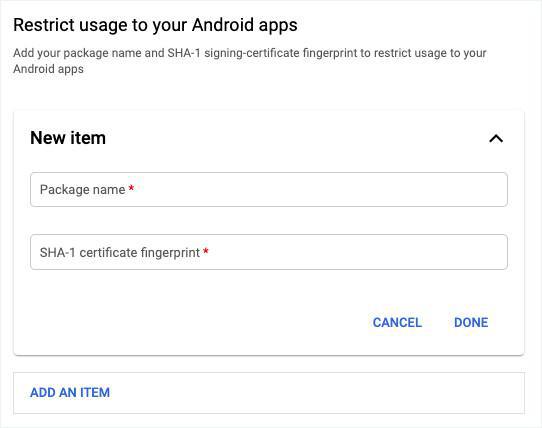
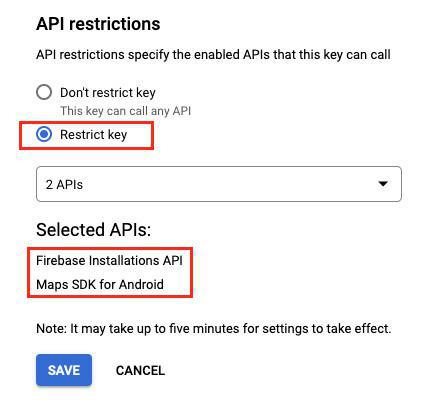
9. Under API restrictions, select Restrict key
10. In the drop-down menu, select:
- Maps SDK for Android
- Firebase API Installations
11. Click "Save"
12 - Copy the API key and paste it in step 5.4 of your Android submission process in your GoodBarber backend

Create a Firebase project
1. Go to "Firebase Console"
2. Click "Create a Project"
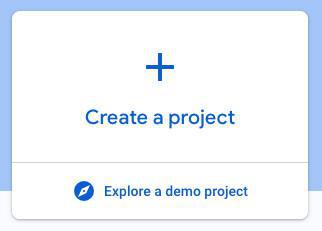
3. Click "Add Firebase to Google Cloud Project"
4. Click "Select a Google Cloud project"
A list of existing projects is displayed.
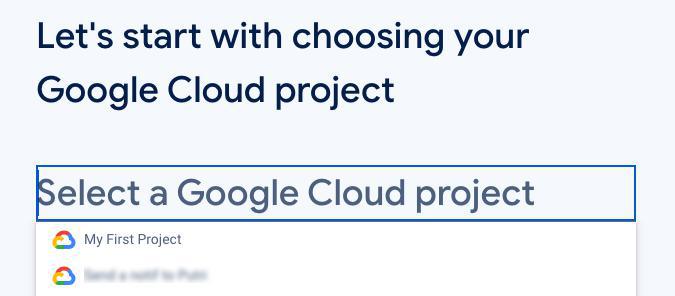
5. In this list, select the project you created at step 3 of this online help*
6. Click "Continue" in the next steps to create your Firebase project**
*Read this online help to make sure to link the Firebase project to the right Google Cloud project.
** It is up to you to Disable / Enable Google Analytics for your Android app now or you can always enable Google Analytics later on).
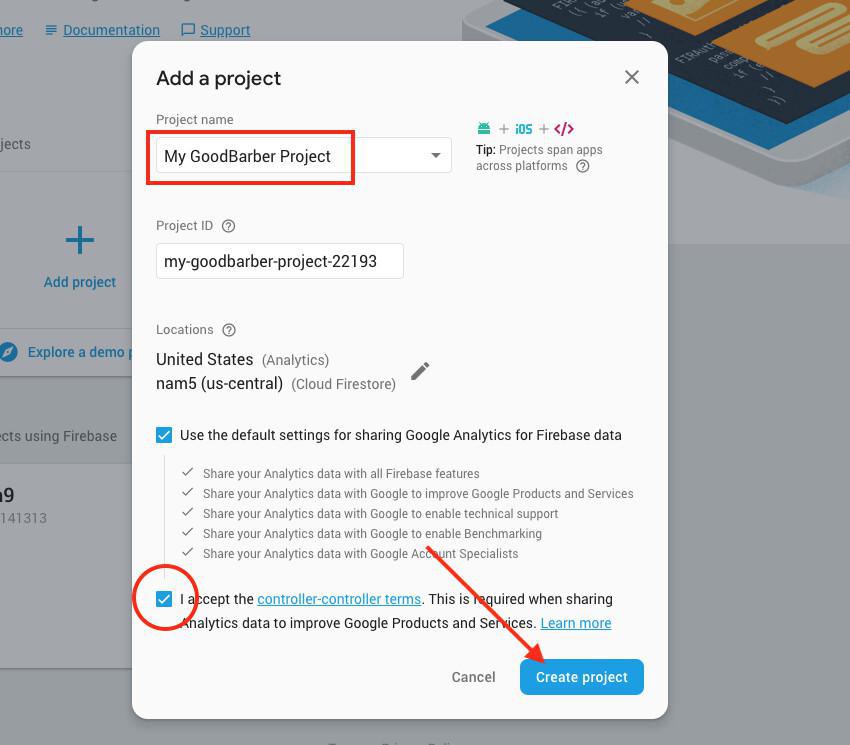
Add Firebase to your Android app
From the dashboard, after checking that you are in the right project, click on the Android logo.
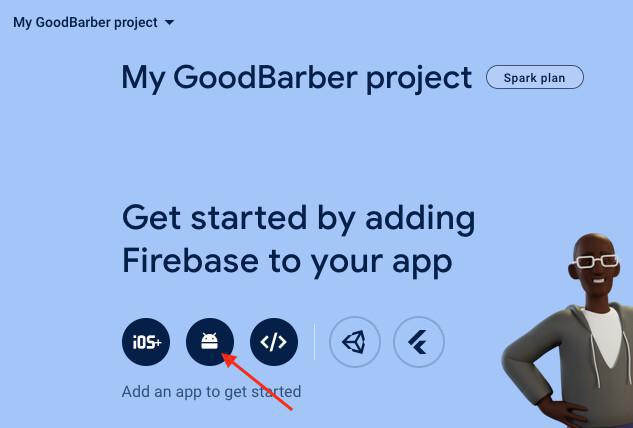
1. In the Android package name box fill in the package name of your app given in your back office
2. Click on "Register app" on Firebase console
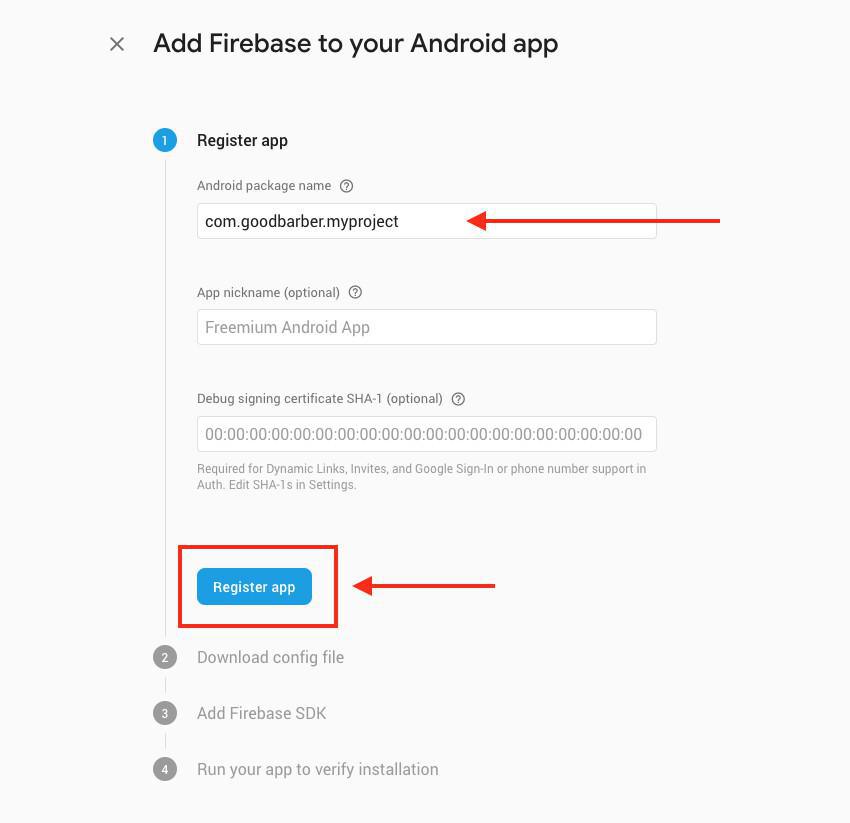
3. Click the "Download google-services.json" button to download the configuration file.
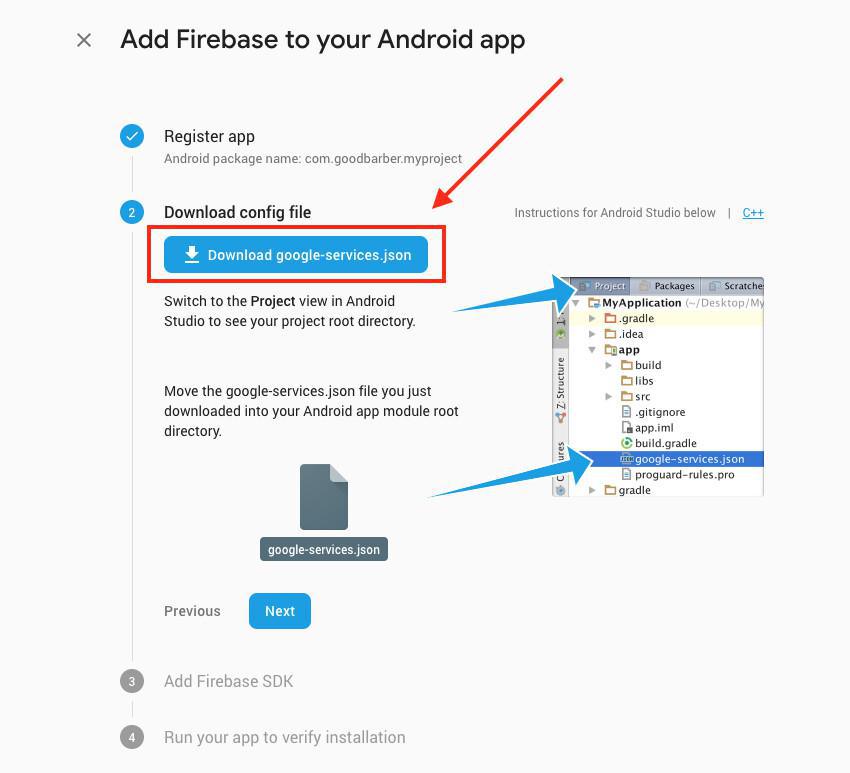
4. Upload the Google-service.json file on your GoodBarber back office
5. Click "Next" on Firebase platform
6. Click "Next", you have nothing to do at this step because the Firebase SDK is included by default in GoodBarber apps
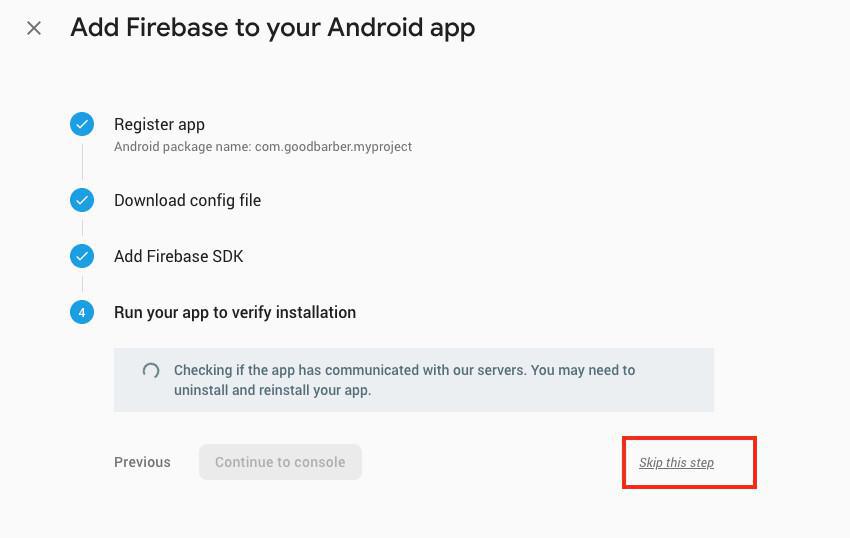
7. Click "Skip this step", you have nothing to do at this step because the installation of the Firebase SDK is managed by default by GoodBarber.
Service accounts
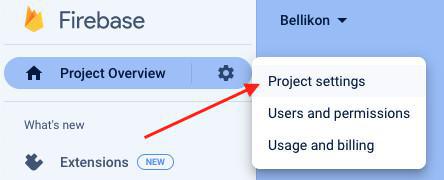
Go to the Settings of your Firebase project:
1. Click on the gear icon to the right of Project Overview
2. Click "Project Settings"
3. Click the "Service account" tab
4. Click “Generate new private key”
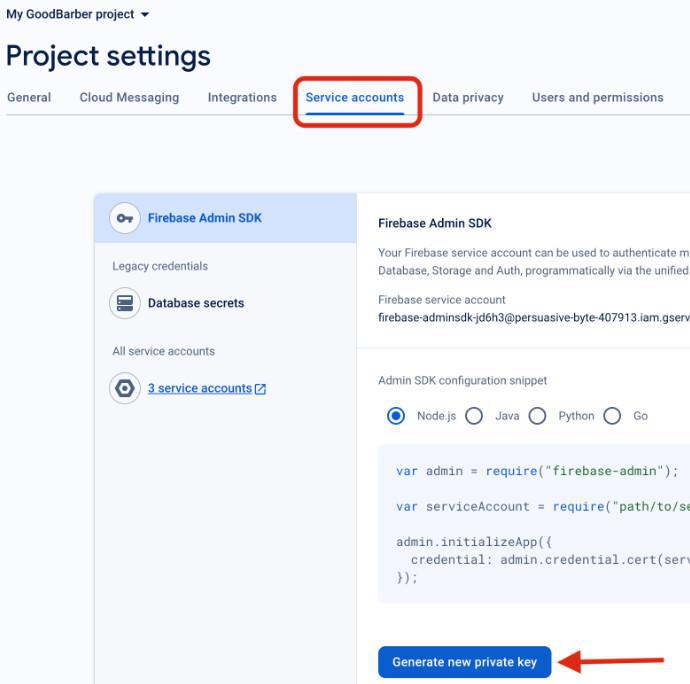
5. Upload that private key to your back office
Generate the Android Ad Hoc version
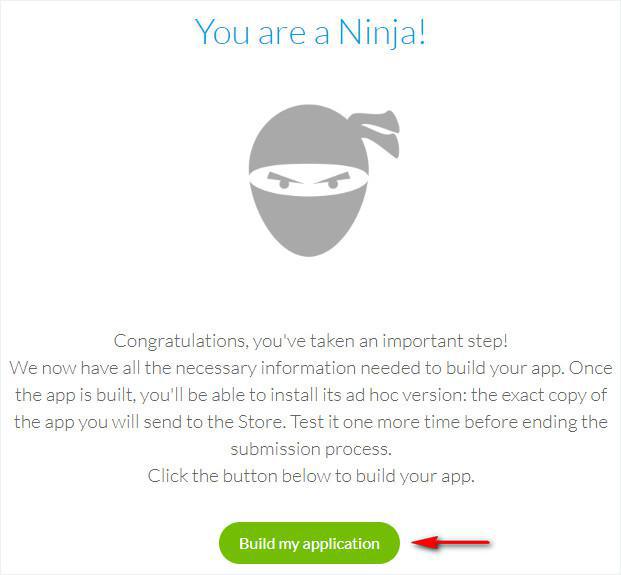
You are done configuring your Android app, you can now compile the native ad hoc version and test it on your device.
1 - Validate the last step
2 - Click on Build my application
Test your Android ad hoc version
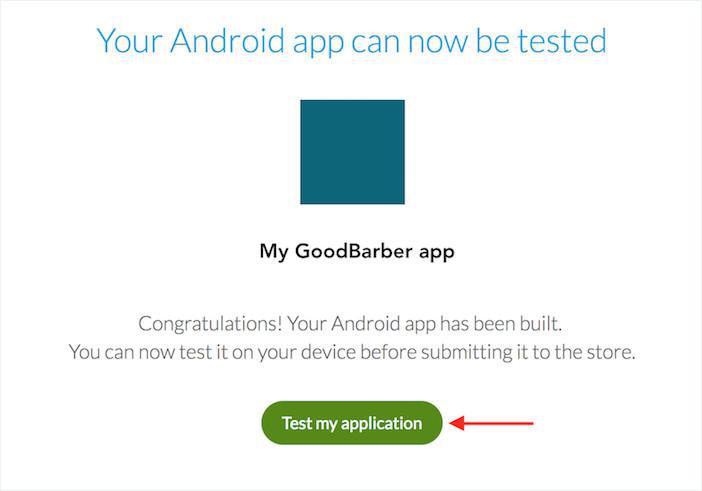
Once your app is built, a new page appears.
1 - Click on Test my application to test the Ad Hoc version
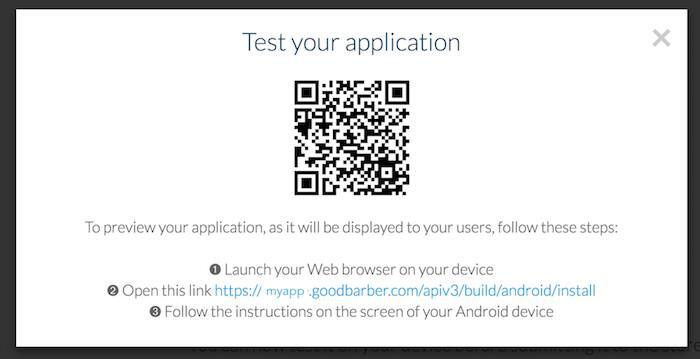
2 - Follow the instructions displayed in the modal window
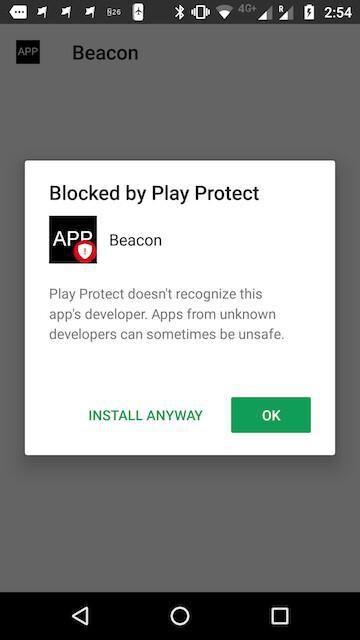
You may receive the following warning when trying to install the ad hoc APK file on your Android phone: “Play Protect doesn’t recognize this app’s developer. Apps from unknown developers can sometimes be unsafe”.
Google Play Protect considers as potentially dangerous any app downloaded from another source than the Play Store. This warning is therefore normal, as the ad hoc version isn’t downloaded from the store but directly from your project. Don’t you worry though: GoodBarber is a safe source!
You can go ahead and click on “Install anyway” to test the ad hoc version on your Android phone.
In case you tapped “OK” by mistake, the current and future installations of that specific APK file will be blocked, but there is still a solution:
- Delete the existing APK file from the “Downloads” menu of your Android device,
- Download the file from GoodBarber again,
- Click on “Install anyway” when asked to choose.
Modify your app or submit it to the Google Play Store
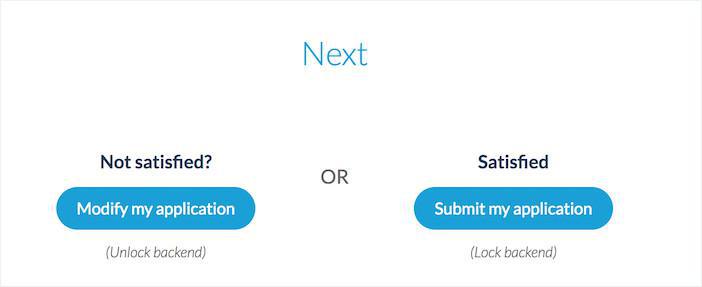
After the test, go back to Sales channels > Android App > Publish .
Modify my application - this action unlocks your GoodBarber backend, so you can edit your app and rebuild it (if you do, you won't have to modify your API keys).
Submit my application - this action will allow you to proceed with the publication of your app.
Your backend is locked until your app is published in the Google Play store. A confirmation is asked so you do not lock your backend by mistake. Now, what is left to do is to submit your Android app to the Google Play Store.
When the project is ready, click Continue to display the dashboard.
- Android - Publication timeframe
- Android - Register for a Google Play Developer account (Mandatory)
- Android - Build your app and test the ad hoc version
- Android - Organization Google Play Developer account - First publication of your app in Google Play
- Android - Personal Google Play Developer account - First publication of your app in Google Play
- Android - Update your app in Google Play
- Android - Policy declarations about your App Content in Google Play
- Android - Find the Google Project ID using the Project Number
- Android - Replace a published app with your new GoodBarber app
 Design